Reptiles, with their captivating scales and intriguing behaviors, often require specific environmental enrichments to thrive. Among the most crucial elements are secure and comfortable hiding places, mimicking the natural shelters they would seek in the wild. While commercially available hides exist, creating your own offers a unique opportunity to tailor the size, shape, and aesthetic to perfectly suit your reptile's needs and your terrarium's design. From simple crevices to elaborate rock formations, the possibilities are virtually limitless, allowing for a truly customized habitat. Building your own also provides cost savings and immense satisfaction.
This guide provides a detailed step-by-step process for constructing realistic reptile rock hides using readily available materials, ensuring both safety and visual appeal. Whether you're a seasoned reptile keeper or a curious beginner, you'll learn to craft durable, attractive, and most importantly, reptile-safe hides that will enhance your pet's wellbeing and the overall beauty of your terrarium. Let's dive into the step-by-step instructions and begin crafting the perfect hide for your scaly friend!
Preparation and Safety Guidelines
- Insulation foam
- Hot wire foam cutter
- Gorilla glue
- Soldering iron
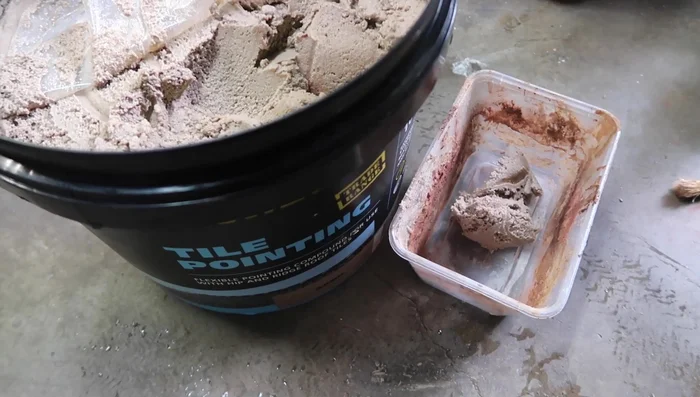
- Tile pointing
- Cement oxide colorants
- Acrylic paints
- Always use non-toxic materials. Avoid paints, sealants, and adhesives containing harmful chemicals that could leach into the enclosure and harm your reptile.
- Ensure the rock hide is securely constructed and cannot collapse, trapping or injuring your reptile. Avoid sharp edges or points.
- Thoroughly clean all materials before construction and allow them to dry completely to prevent the introduction of bacteria or parasites into your reptile's habitat.
Step-by-Step Instructions
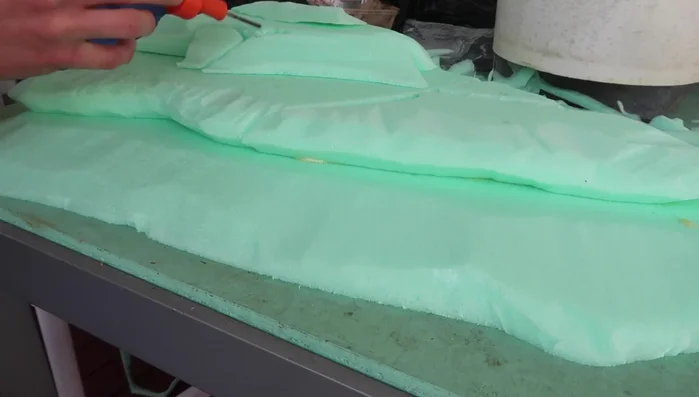
Shape the Foam Base
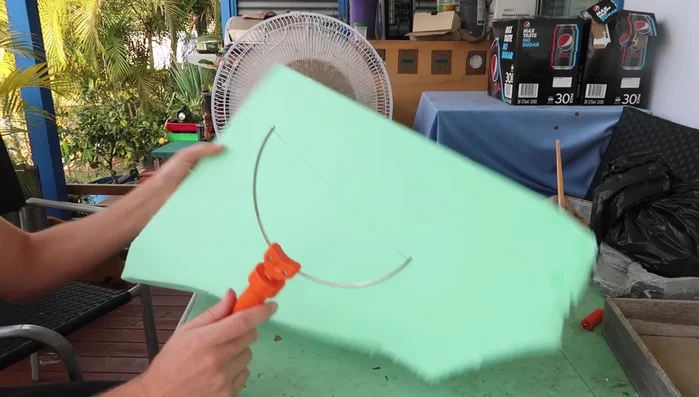
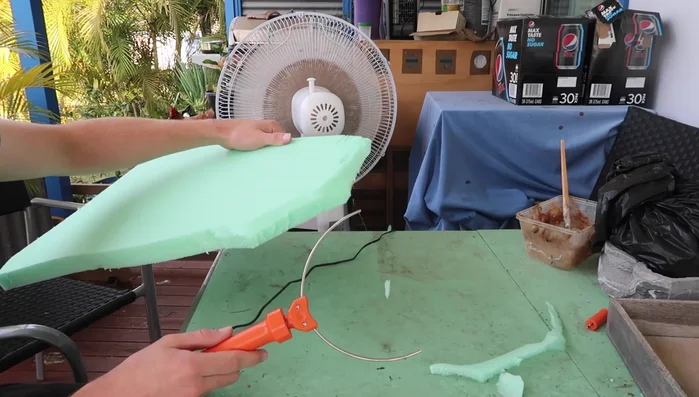
- Cut out the basic shape of the rock from the insulation foam.
- Use a hot wire foam cutter to carve and shape the foam, creating a natural-looking curvature.

Shape the Foam Base Create & Attach Layers
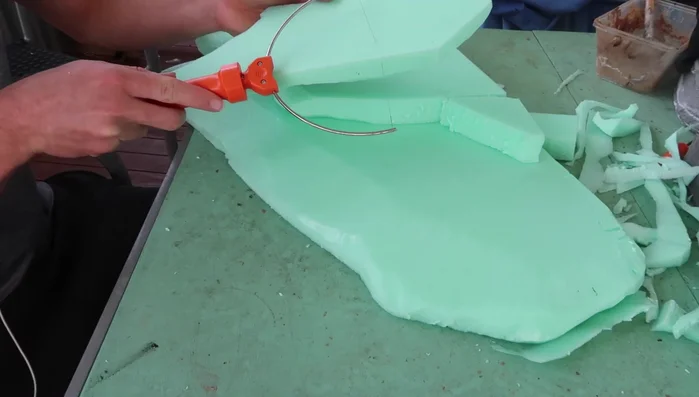
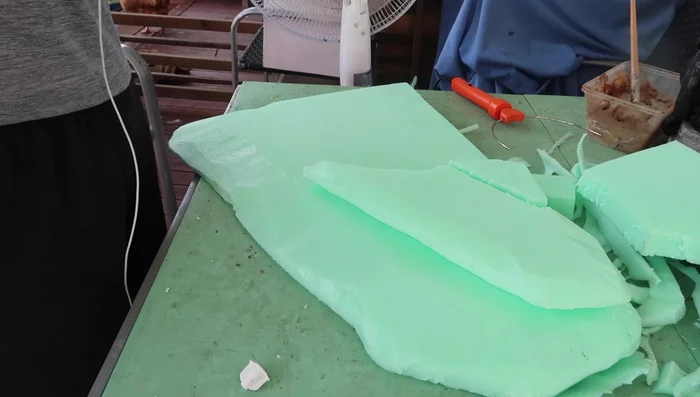
- Create additional foam pieces for stacking and layering, shaping them with the hot wire cutter.
- Attach the foam pieces using Gorilla glue, ensuring surfaces are wet for proper activation.
Create & Attach Layers Carve Details
- Use a soldering iron to carve lines, crevices, and details into the foam, mimicking natural rock formations.
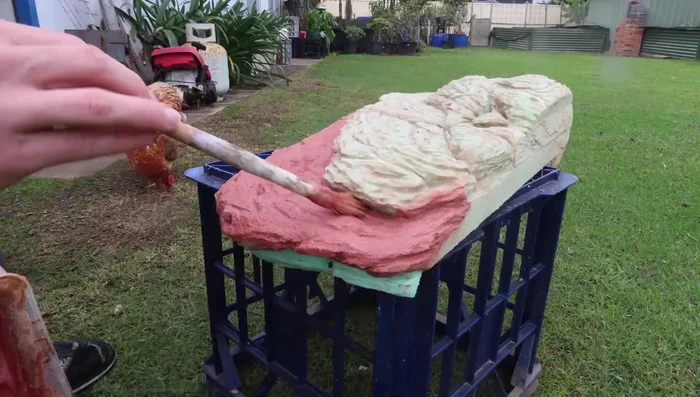
Carve Details Apply Tile Pointing
- Apply several coats of tile pointing, wetting down the first layer for easy spreading. Subsequent layers require less wetting.
- Add cement oxide colorants to the tile pointing for desired coloration.
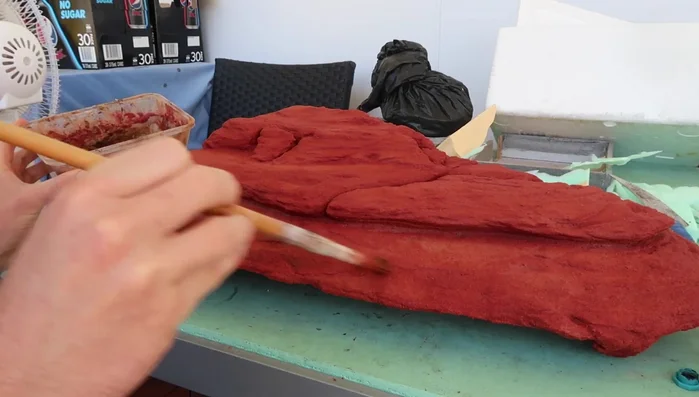
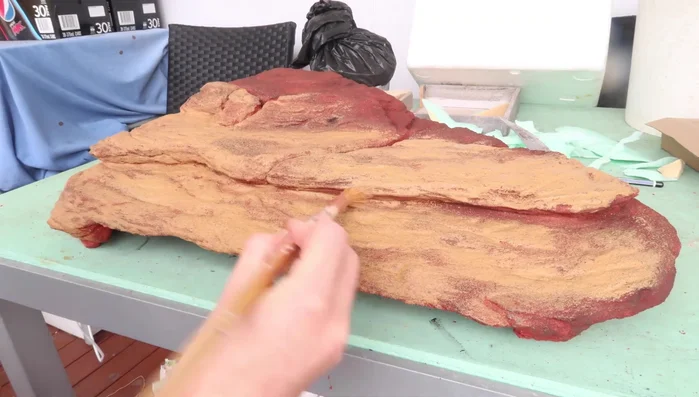
Apply Tile Pointing Paint & Detail
- Dry brush with acrylic paints to highlight details and create a realistic rock texture.
- Apply additional coats of paint to achieve the desired color and finish.
Paint & Detail
Read more: How to Deep Clean Your Leopard Gecko's Tank: A Step-by-Step Guide
Tips
- Work outdoors with a fan to ventilate toxic fumes from the hot wire cutter.
- Don't worry about overdoing the detailing with the soldering iron; the tile pointing will fill in some of it.
- For a hide rock, add legs to the bottom for easy access by reptiles.
- Use minimal paint for dry brushing to highlight areas effectively.