This comprehensive guide provides a step-by-step walkthrough for installing the Carolina Custom Cages 34-inch T5HO UVB Standard Light Fixture. Designed for reptile enclosures, this fixture ensures optimal UVB distribution crucial for your reptile's health. We'll cover everything from unpacking the contents and preparing the reflector to securely mounting the fixture and connecting the power cord. Even beginners can confidently follow this guide to a successful installation.This guide will walk you through each stage of the process, including removing protective film, attaching mounting clips, inserting the UVB tube (Zoo Med Reptisun tubes are recommended), and securing the power cord. We will also emphasize the importance of proper placement for even UVB illumination and the need to keep heat sources away from the UVB fixture. By the end, you'll have a properly installed and functioning UVB light system, providing your reptile with the essential UV radiation it needs to thrive.
Read more: Top 5 Turtle Terrariums: Reptile Habitats Reviewed
Unboxing and Component Identification
The Carolina Custom Cages 34-inch T5HO UVB Standard Light Fixture arrives in a sturdy craft tube. Each fixture undergoes rigorous testing before shipment, ensuring quality and performance. Inside, you'll find the fixture itself, a hardware bag, and a cord bag.

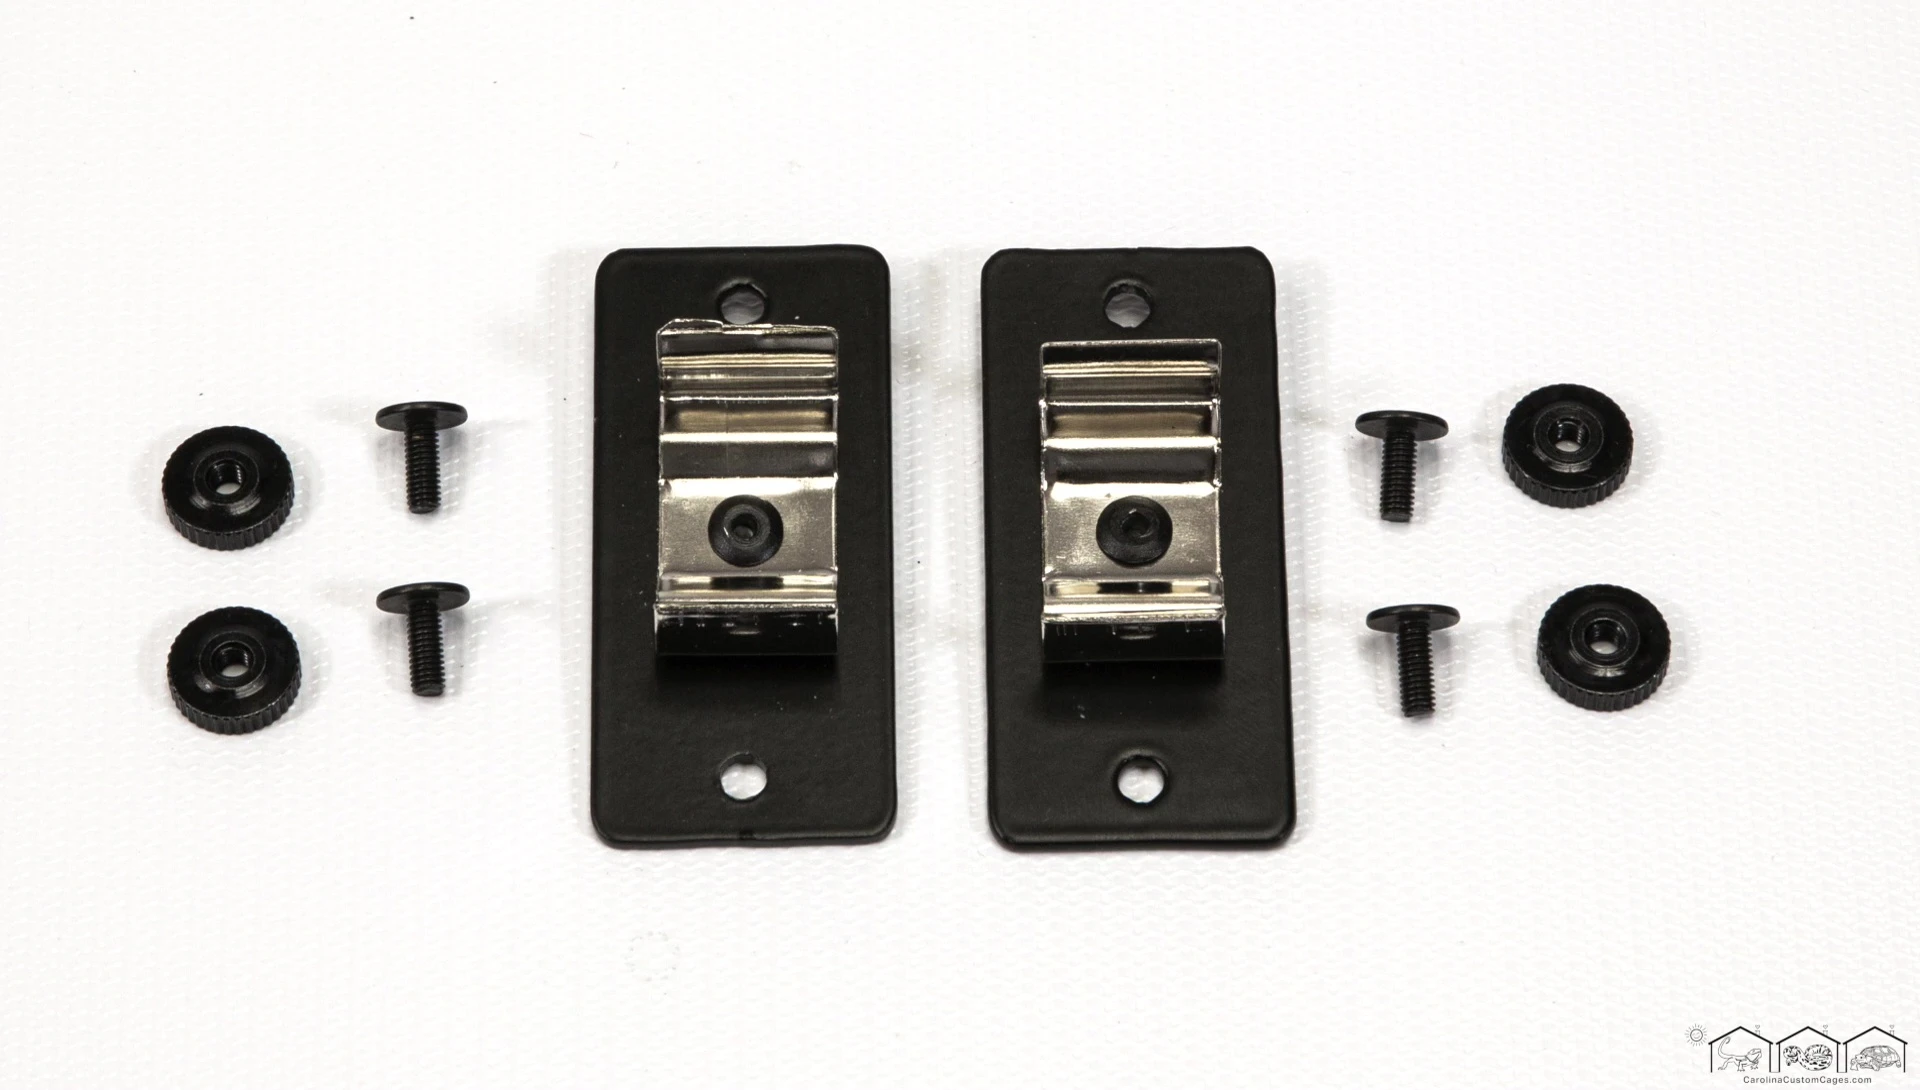
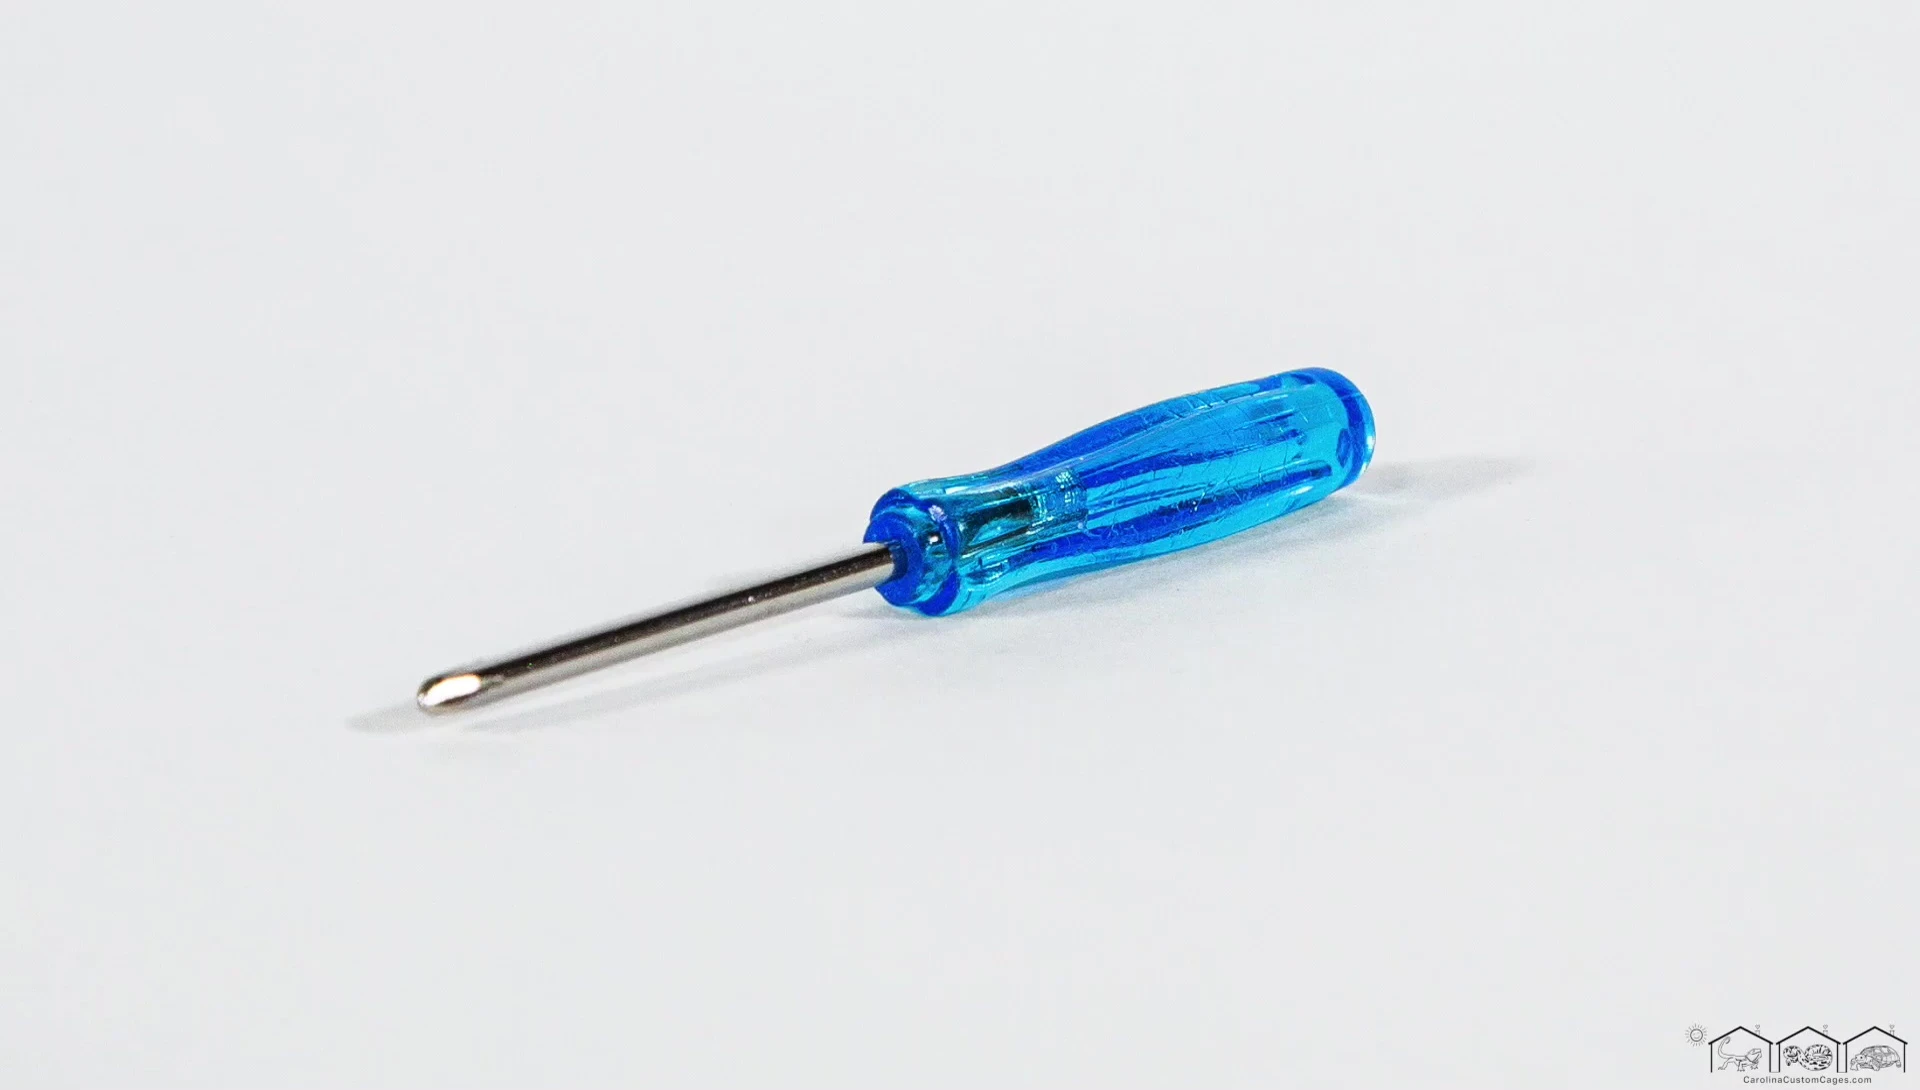
The hardware bag contains essential components: a blue-handled screwdriver, silver wood screws, silver clips with hooks, silver clips with holes, silver clips with black mounting plates, and black screws with thumb wheel nuts.
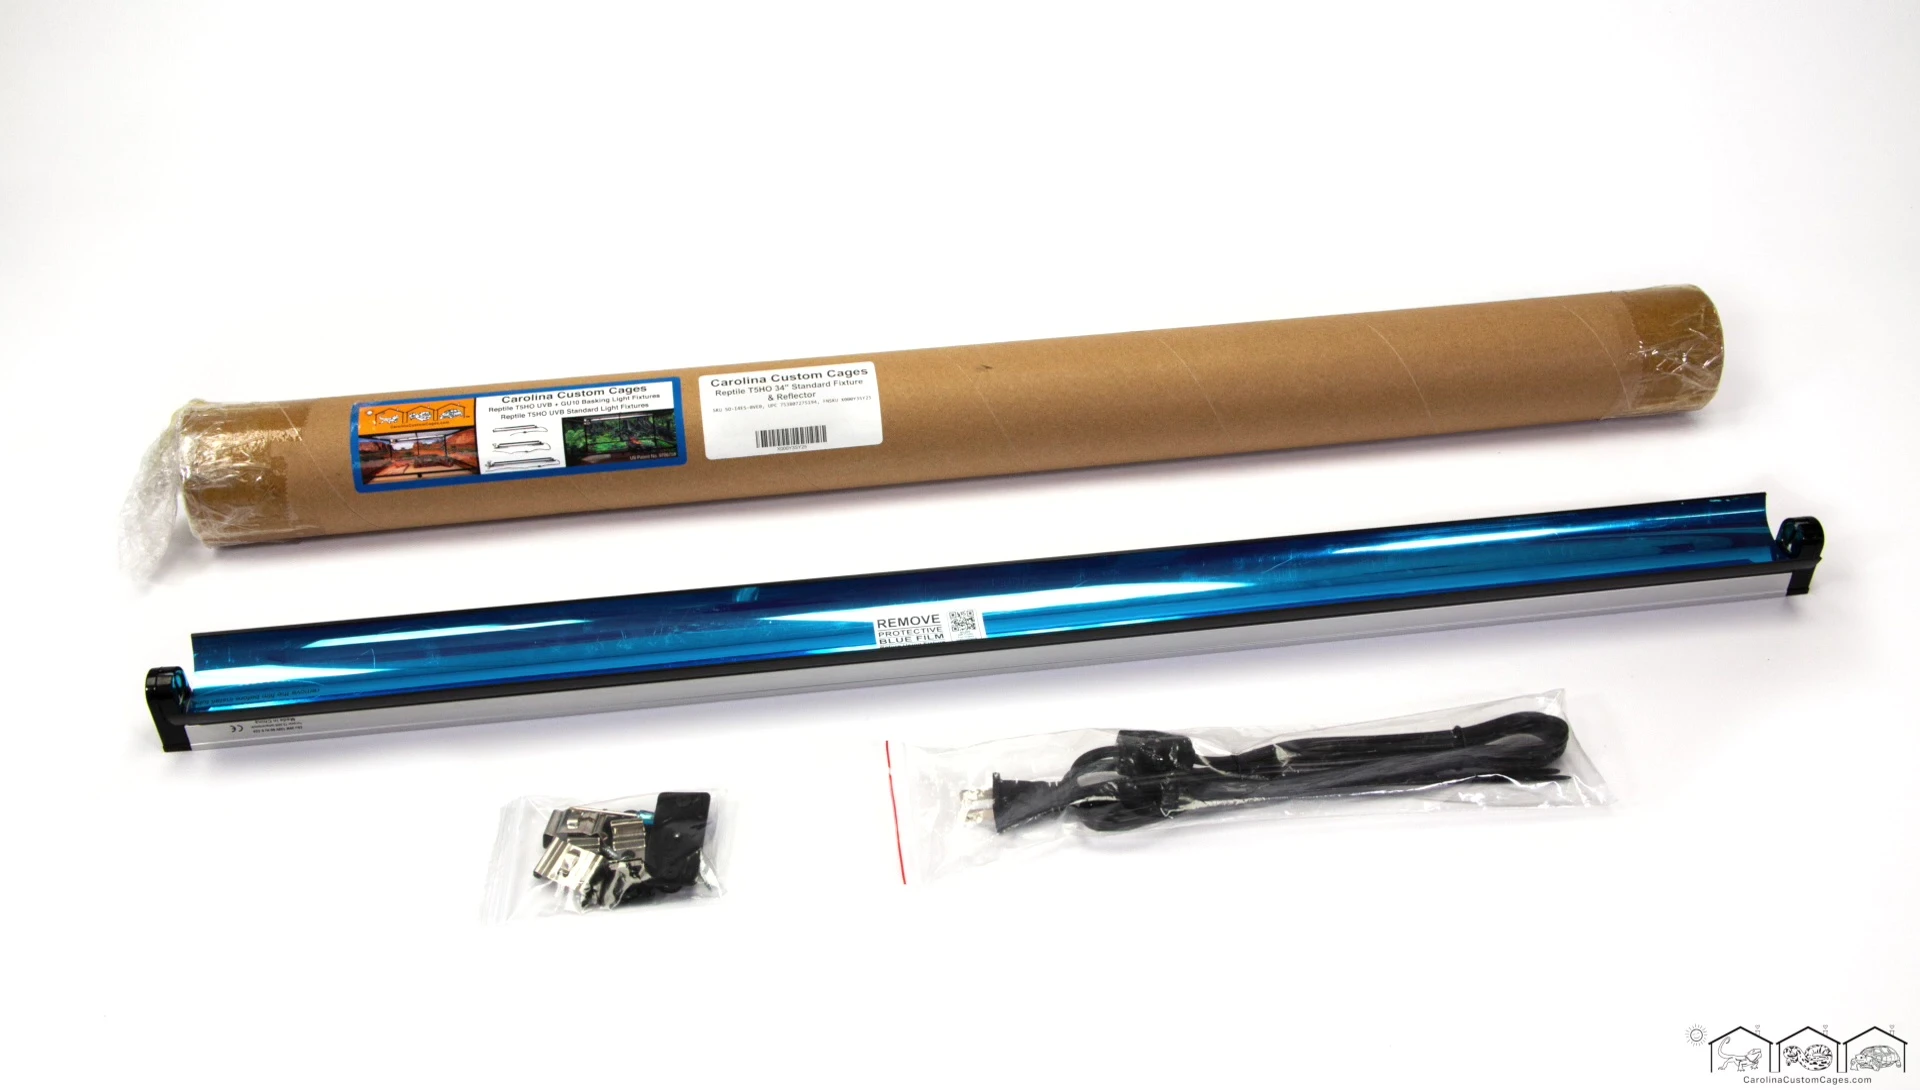
The cord bag includes a power cord with a thumb switch and UV/heat-resistant zip ties. A variety of hardware is provided to ensure compatibility with most enclosures.
Fixture Preparation and Reflector Removal
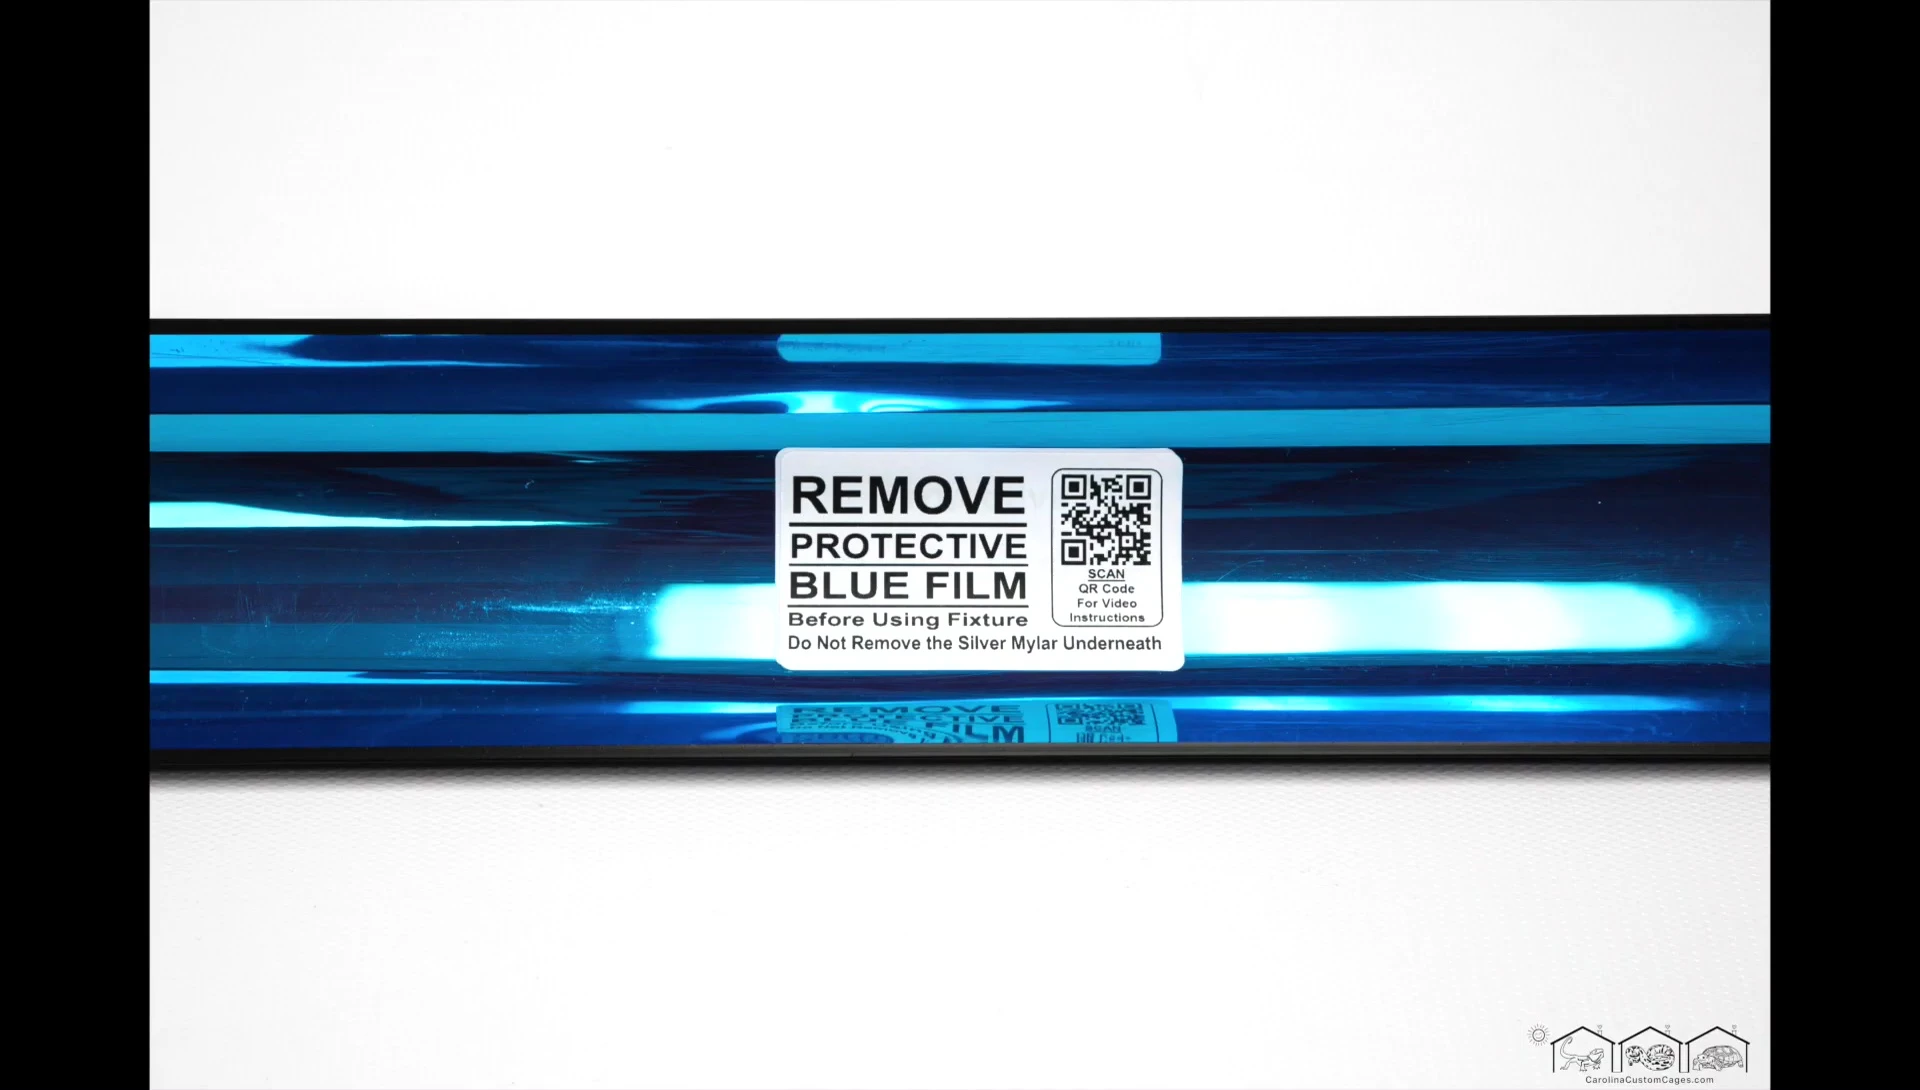
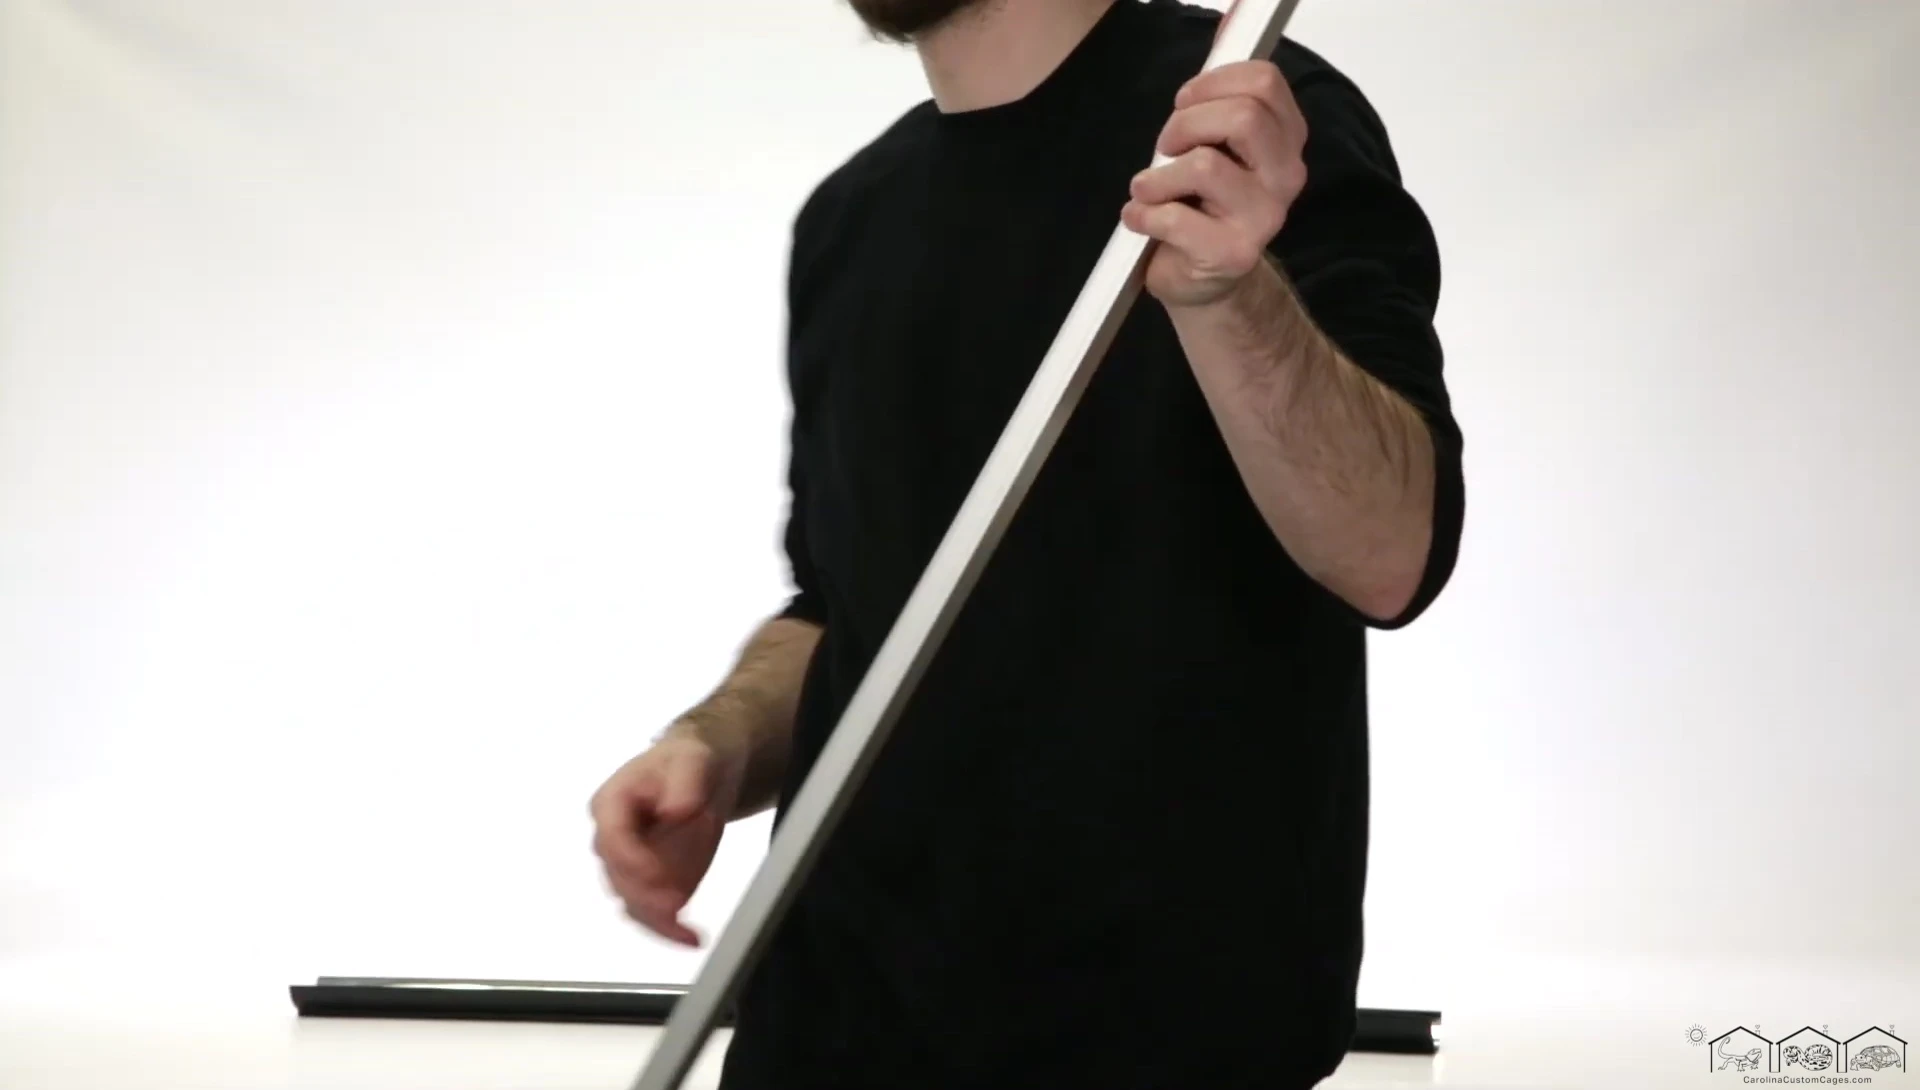
Before installation, remove the protective blue film from the silver mylar reflector. This is crucial for optimal UVB reflection; leaving it on will cause it to melt.
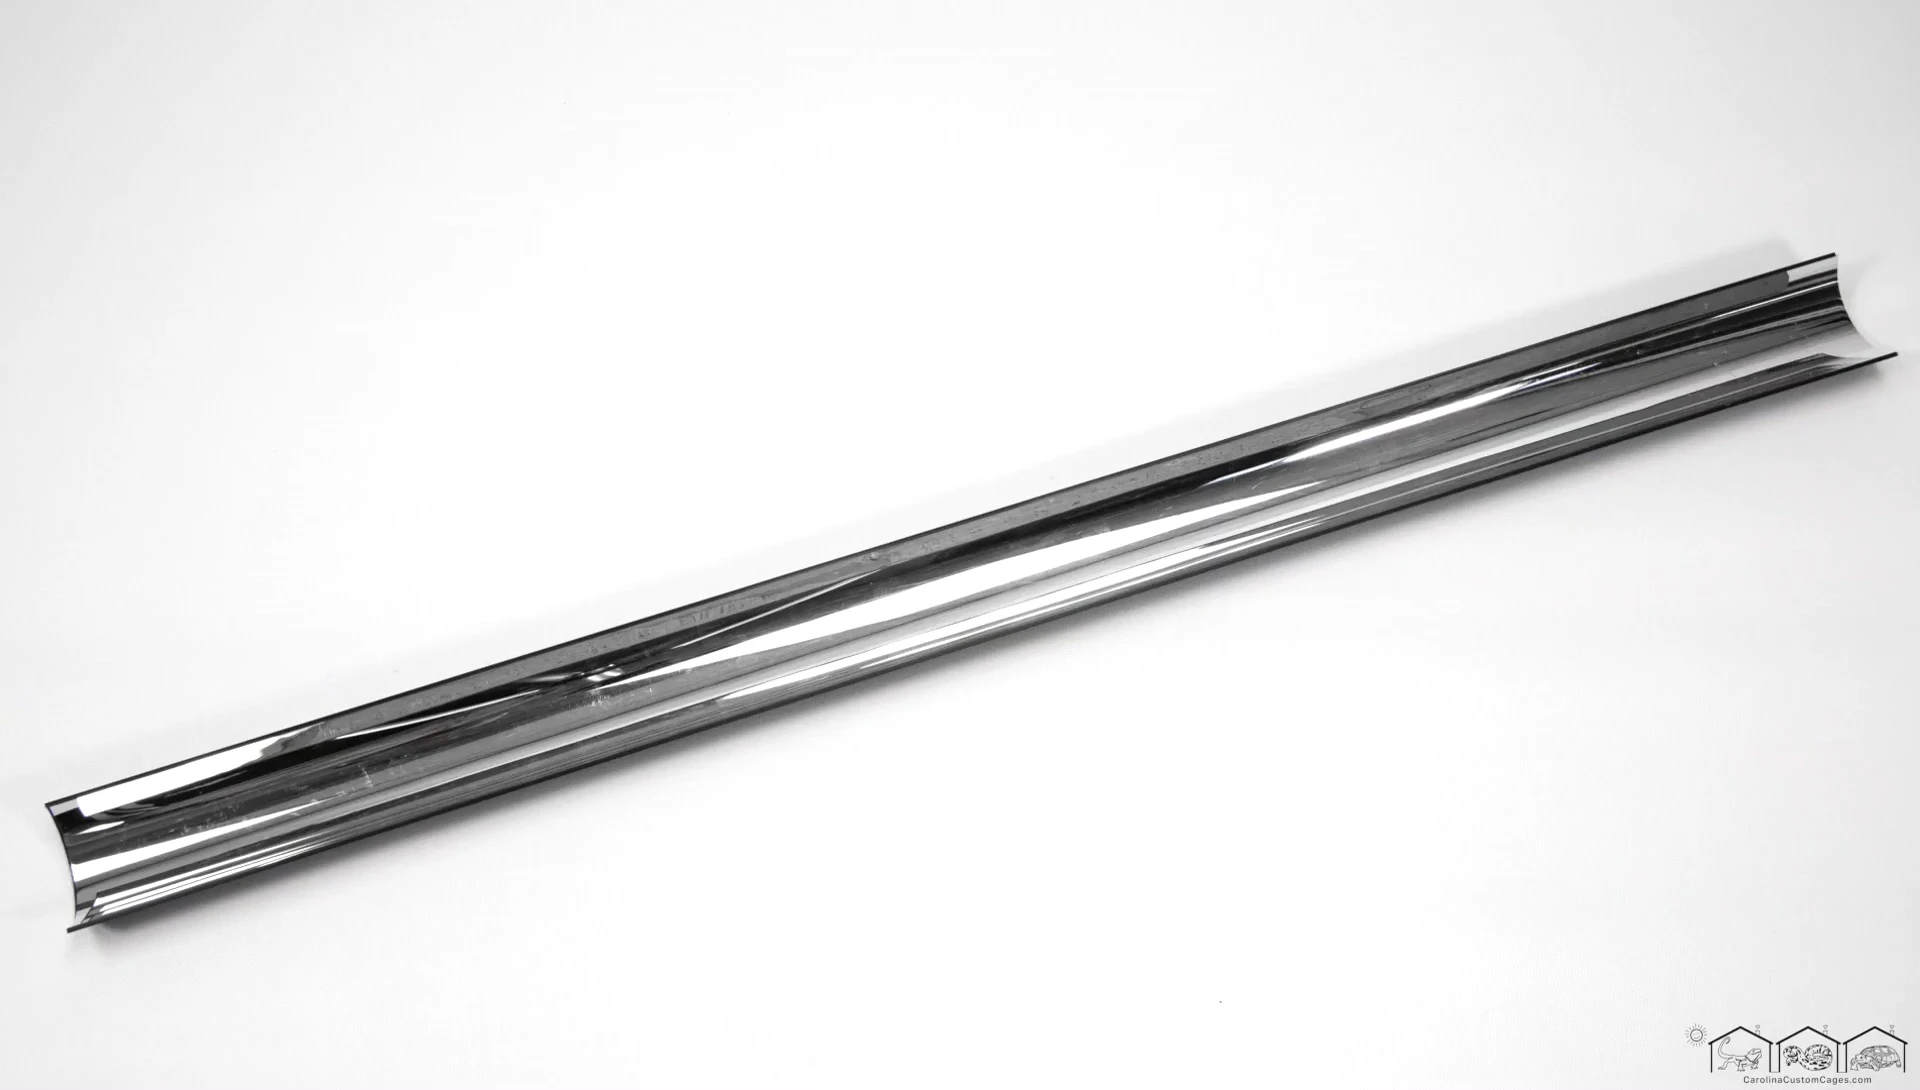
Carefully separate the reflector from the fixture body by gently squeezing one end. This will allow you to access the mounting points and prepare the fixture for installation.
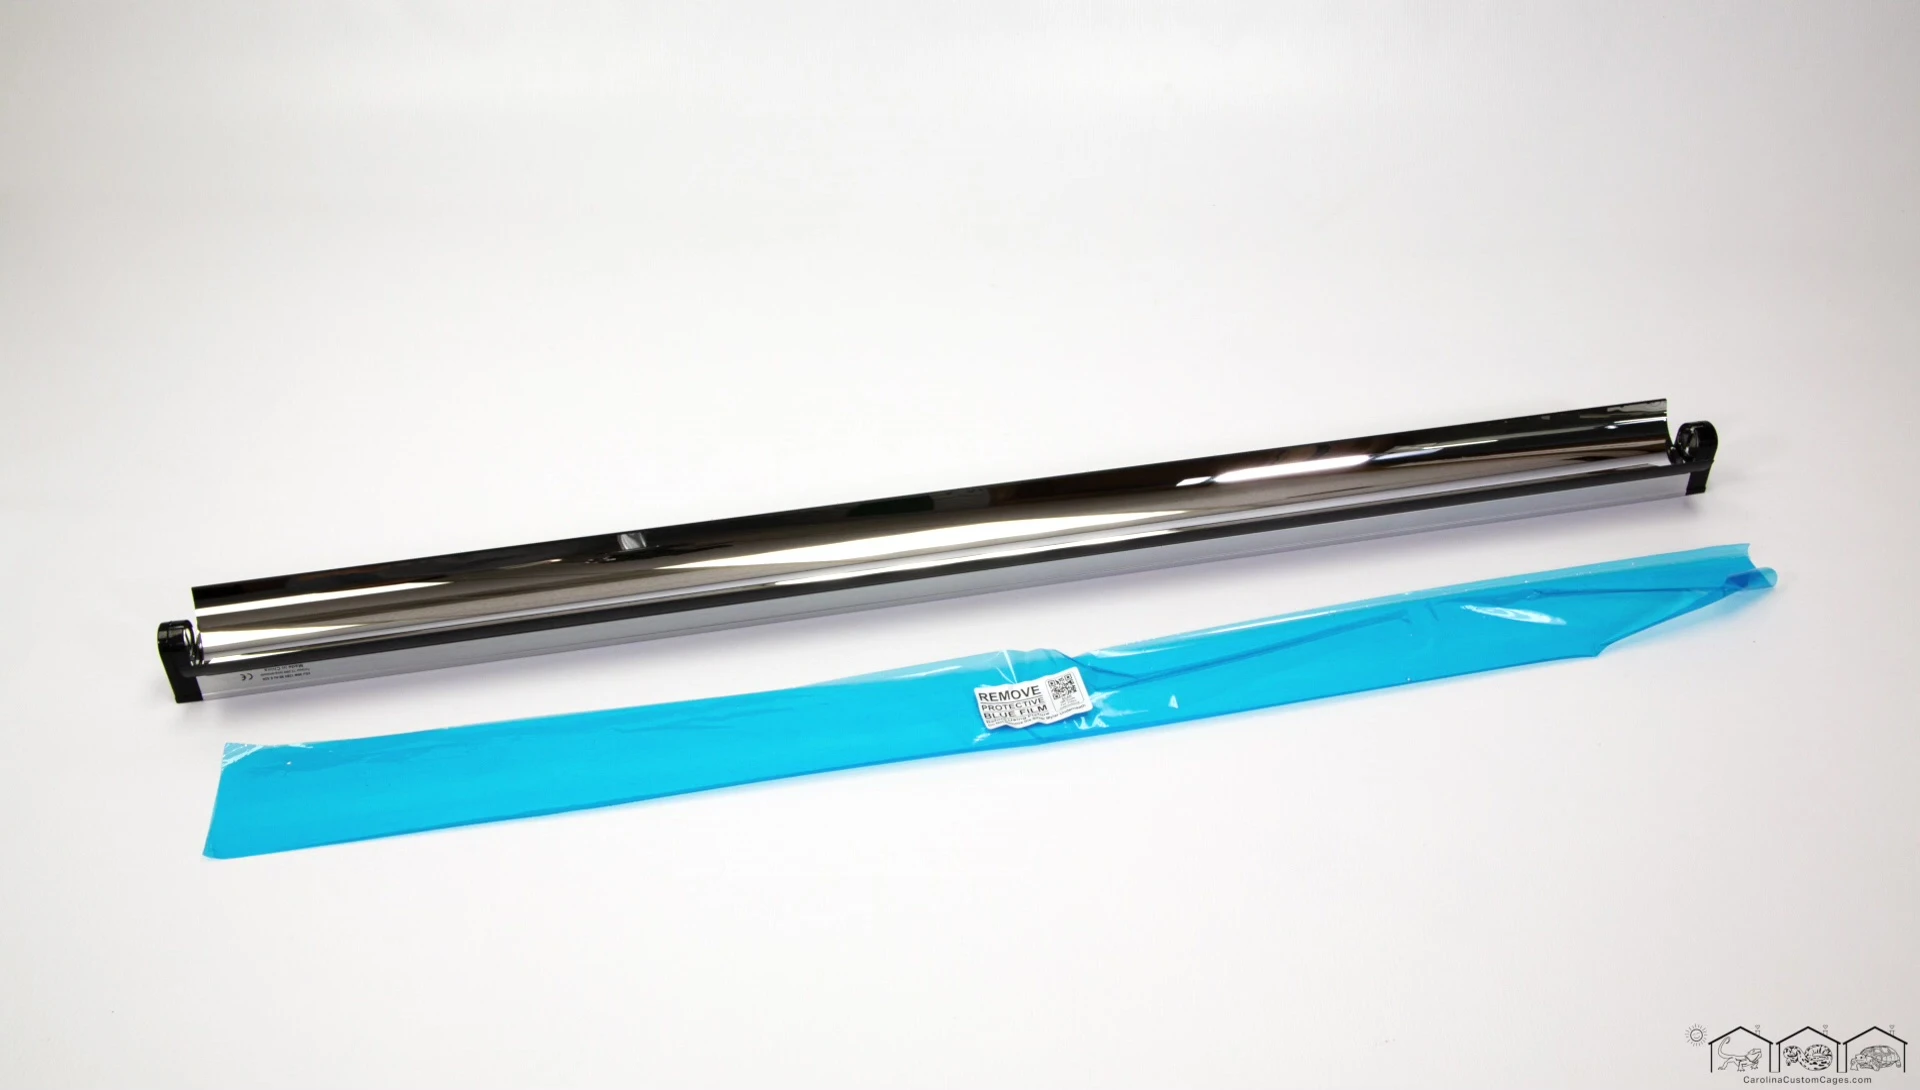
Ensure you only remove the blue film and not the silver mylar underneath. The reflector should now be completely separated from the fixture body.
Mounting the Fixture to the Terrarium
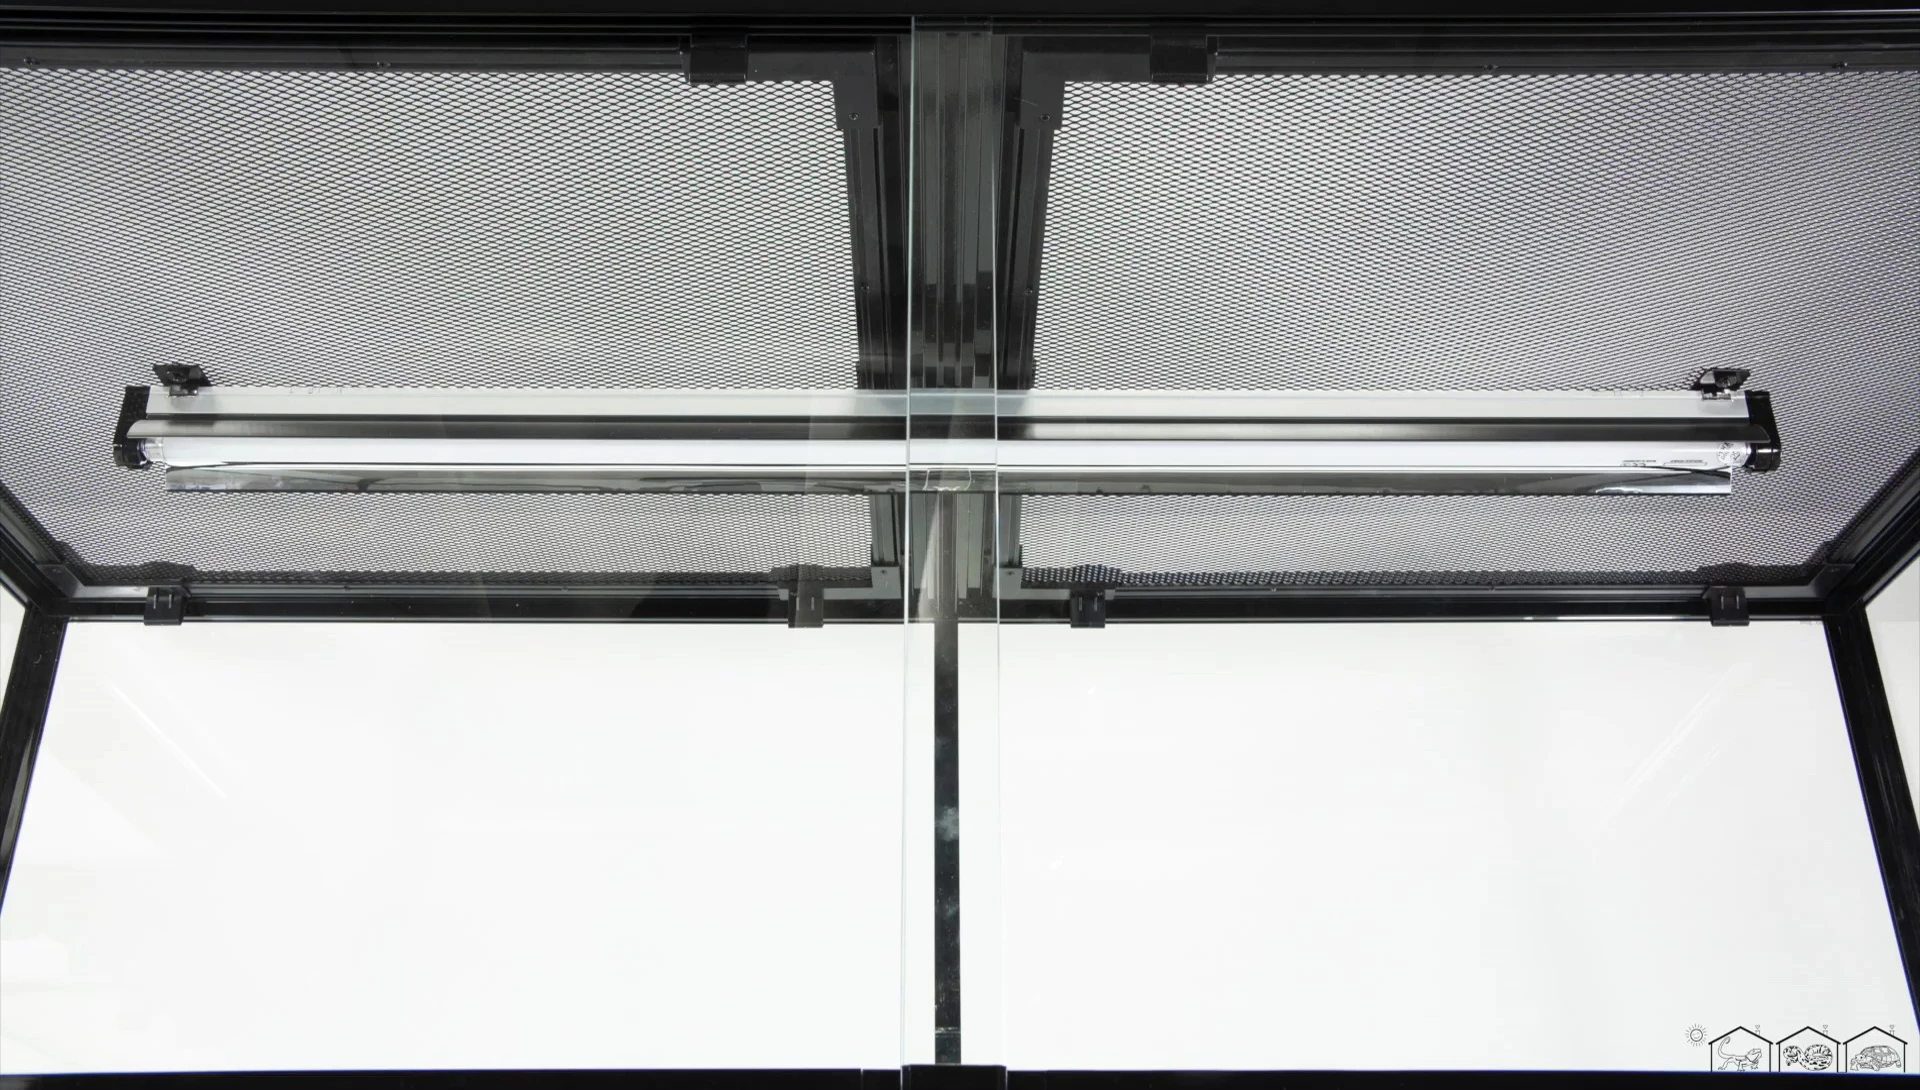
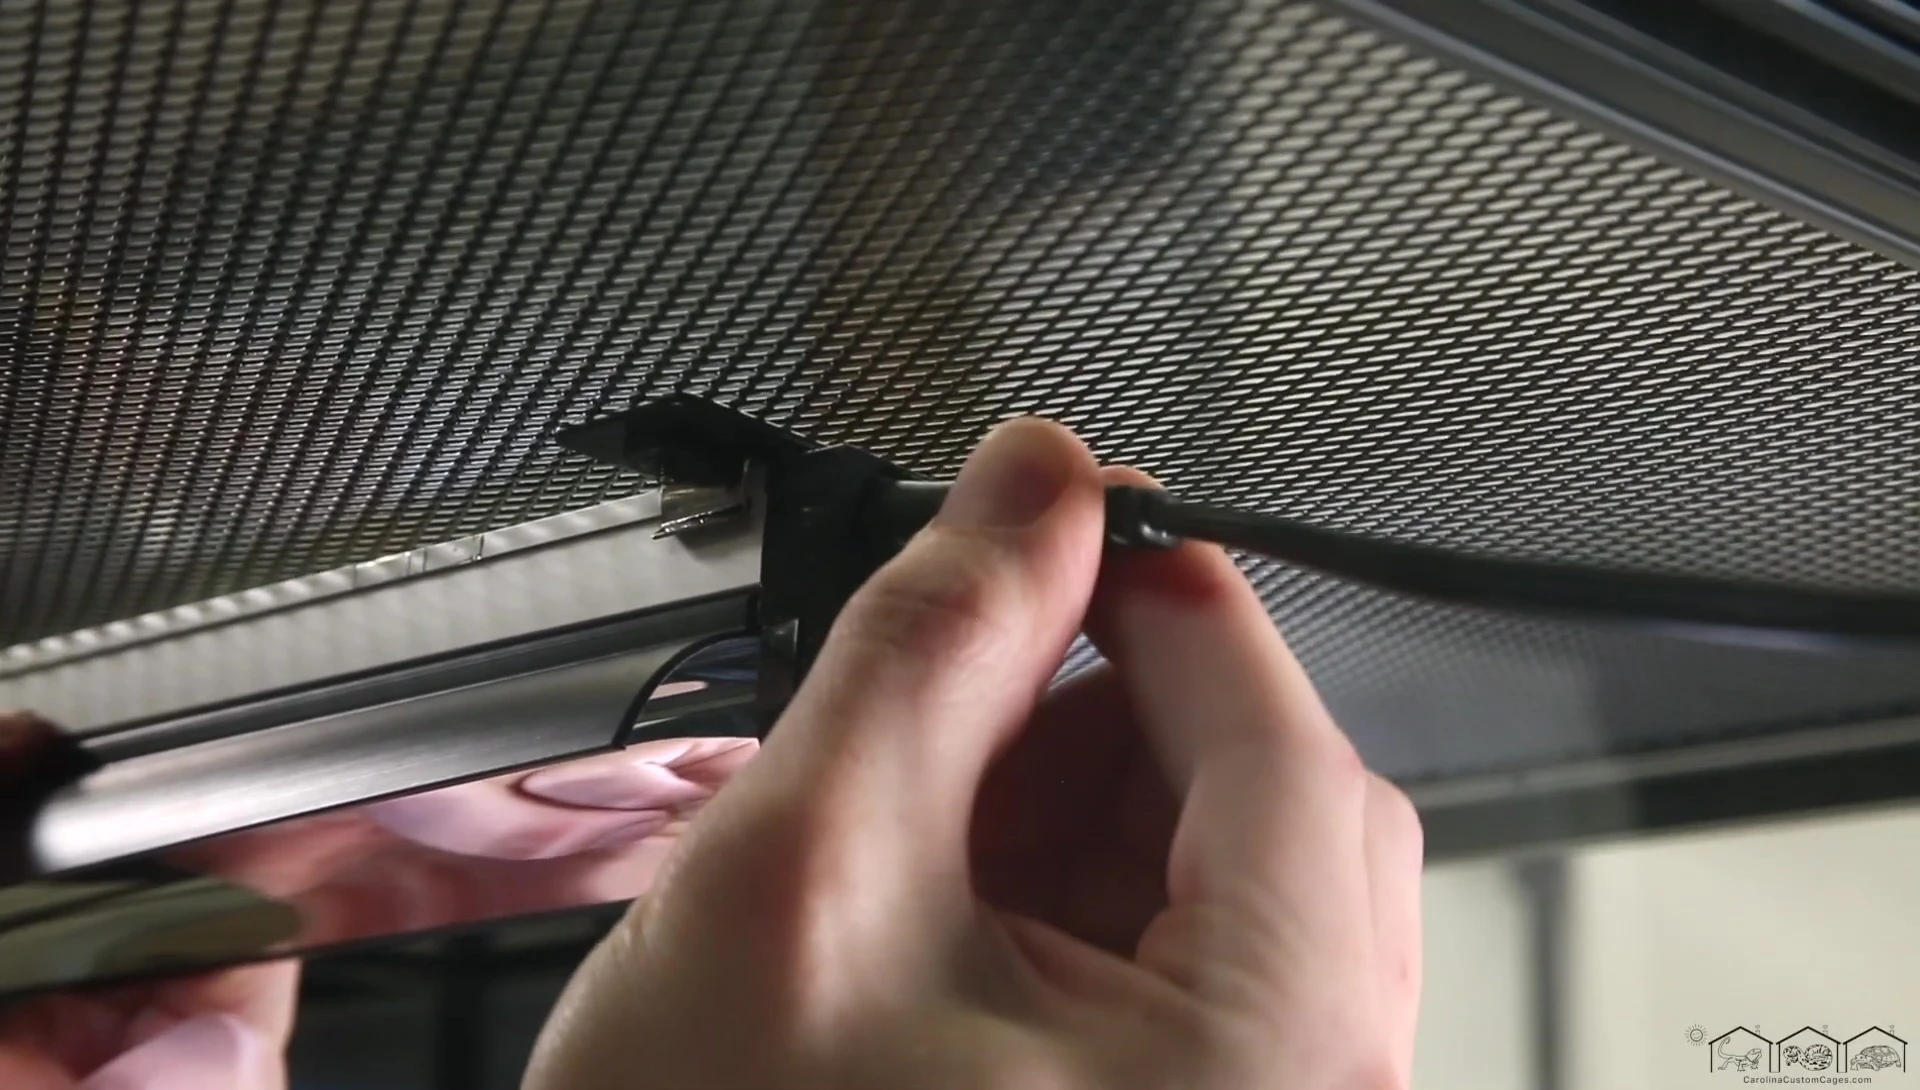
Attach the silver clips with black mounting plates to the ends of the fixture. These clips are sturdy and require aligning one side to the bottom groove before snapping the other side into place.
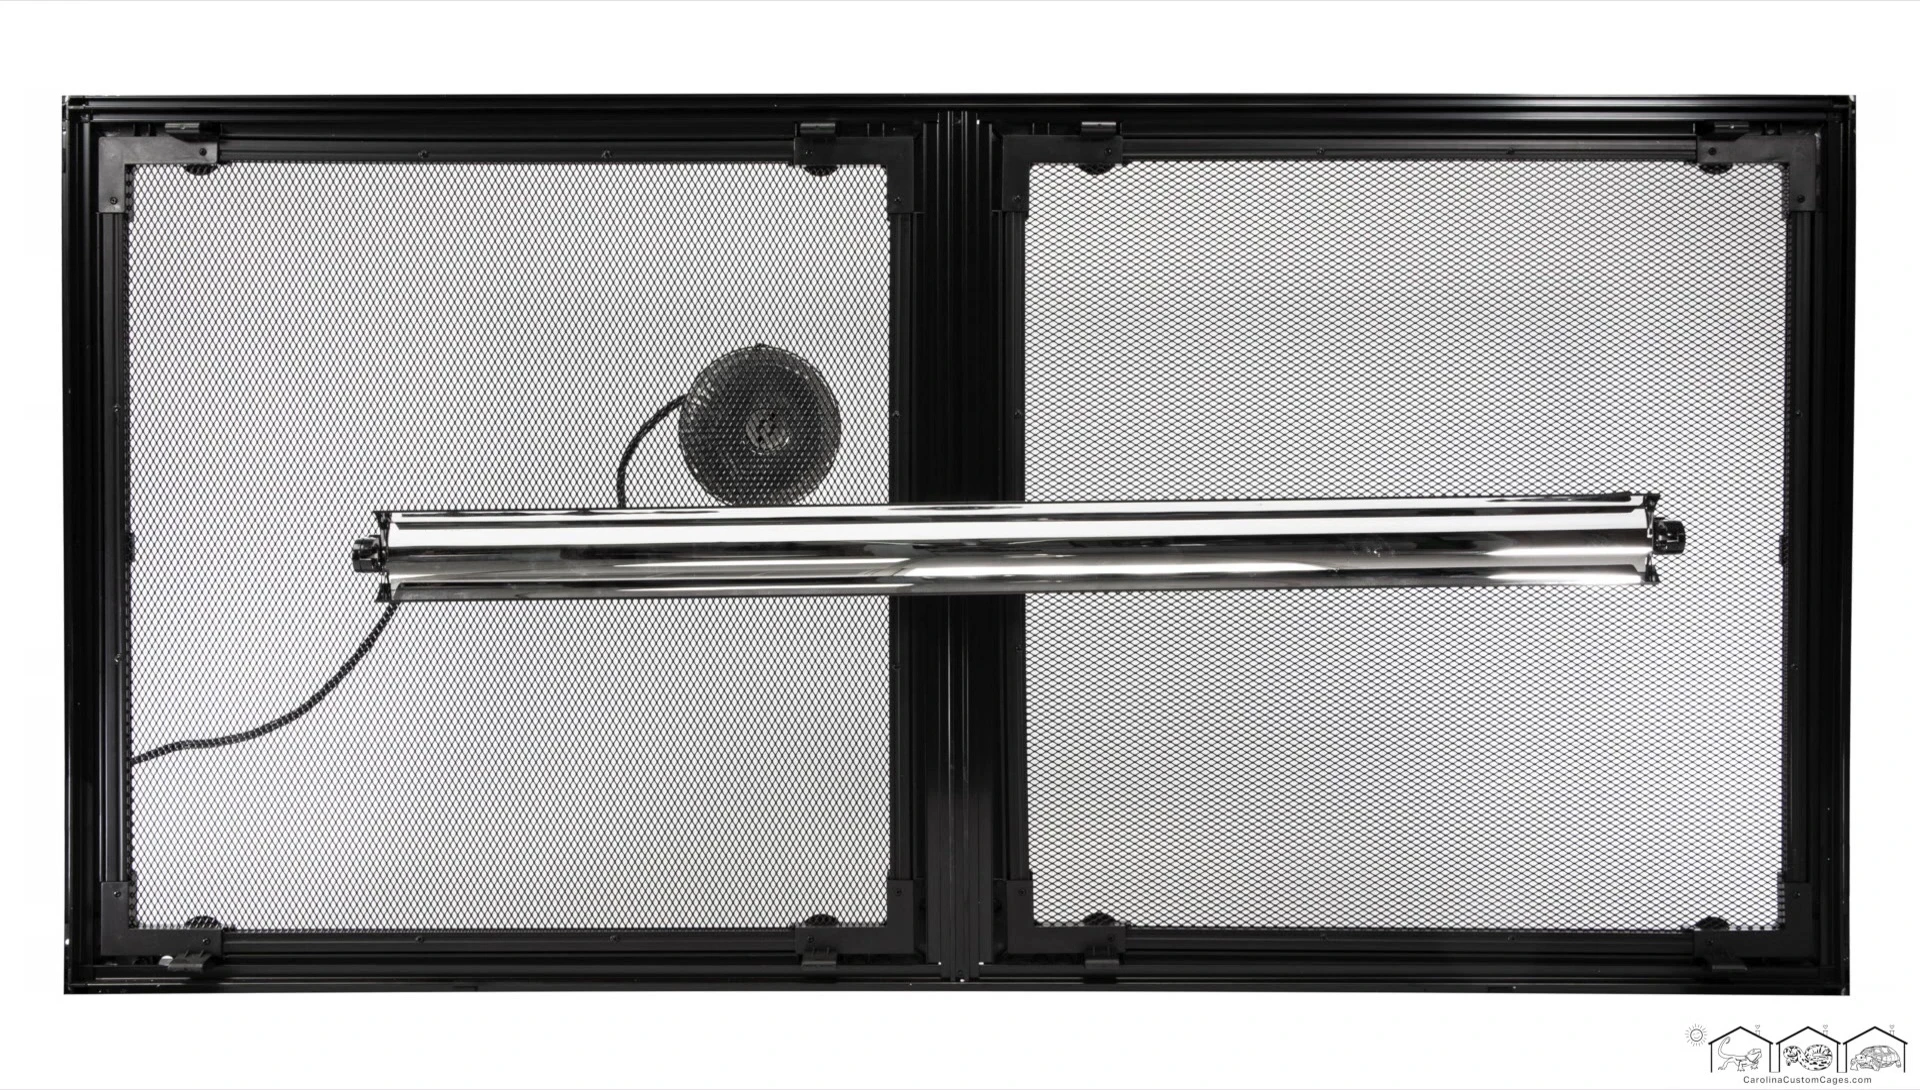
Position the fixture evenly down the center of the terrarium, aligning it with the center turn locks for even UVB illumination. The center of the screen mesh top is ideal for optimal distribution.
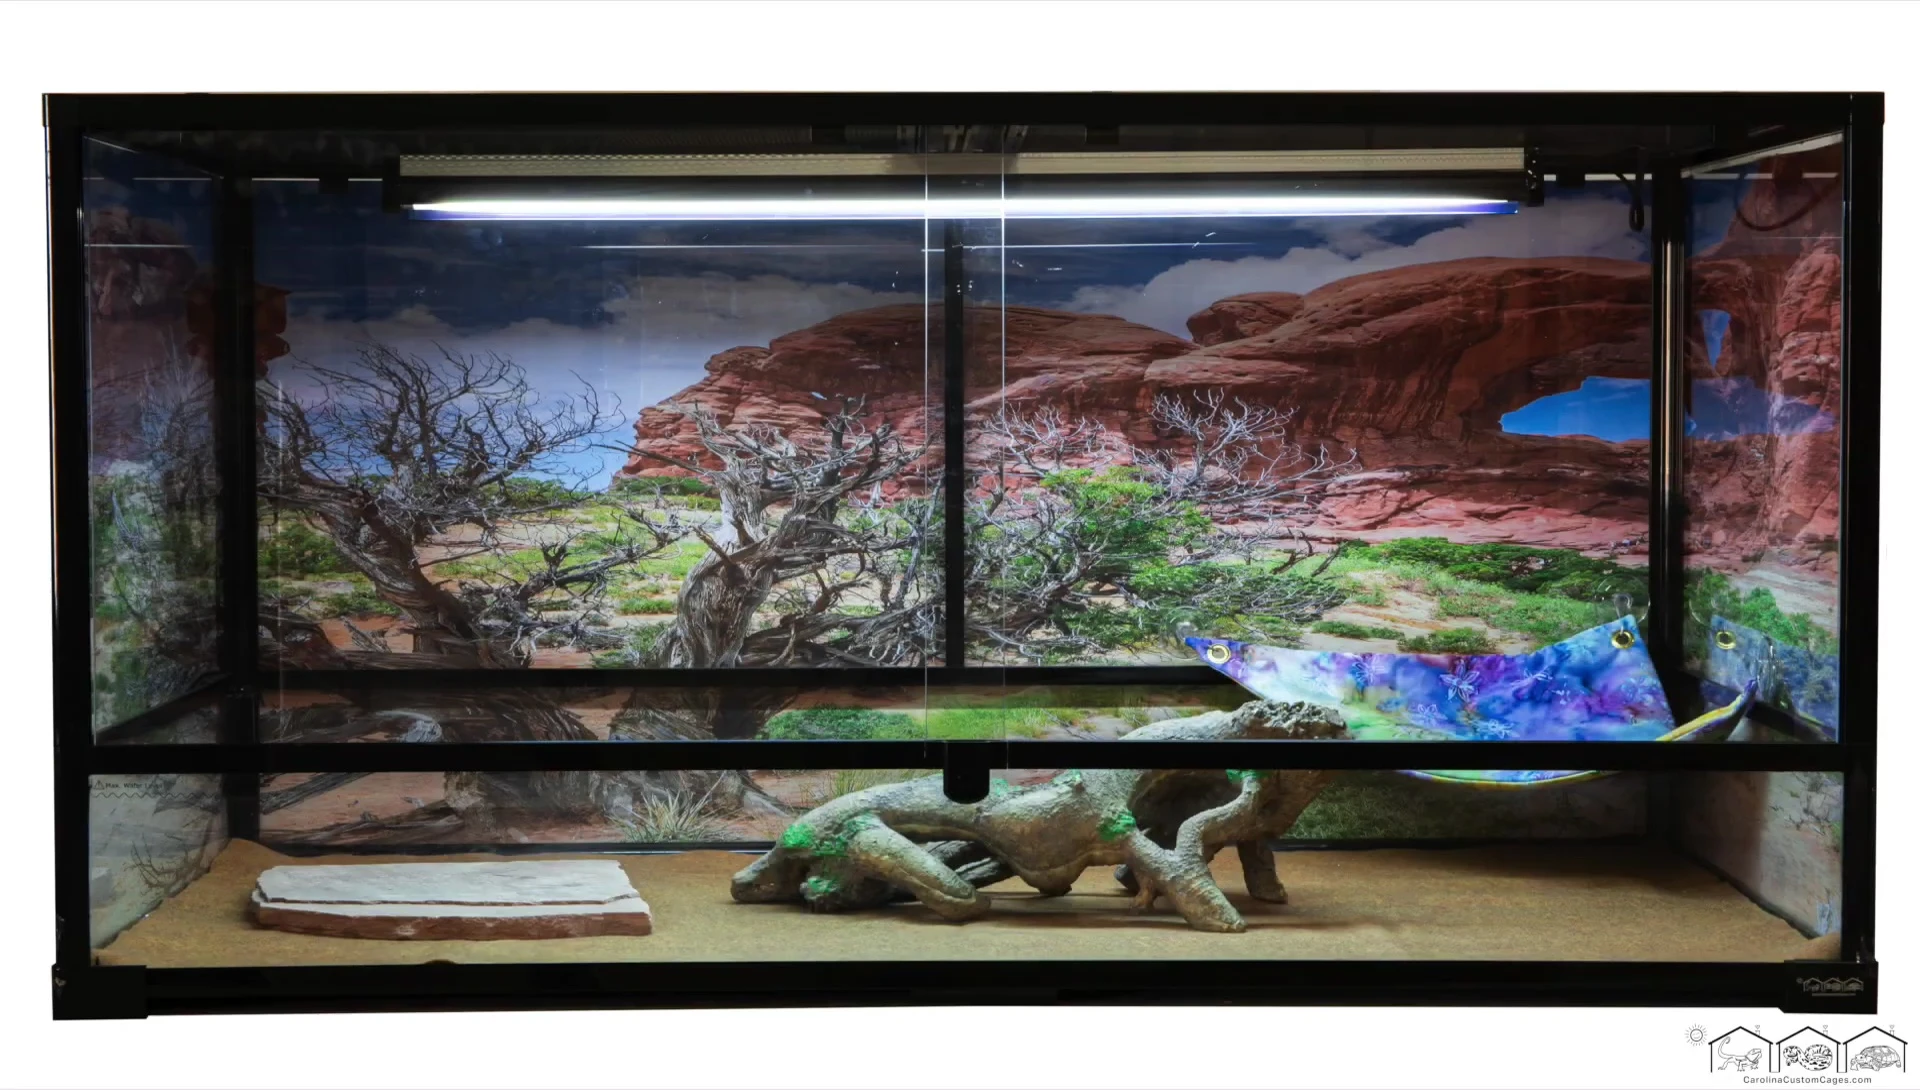
Secure the fixture to the screen mesh top using the black screws and thumb wheel nuts. It's helpful to have a friend hold the fixture in place while you fasten the screws.
Reflector Reinstallation and UVB Tube Installation
To reattach the reflector, gently squeeze one end and slide it into the grooves on the fixture body. This ensures a secure and proper fit for optimal light reflection.

Choose the appropriate UVB tube (10.0 or 5.0) based on your reptile's needs. Zoo Med Reptisun tubes are recommended and individually tested for length and output. The 10.0 is suitable for most desert reptiles.
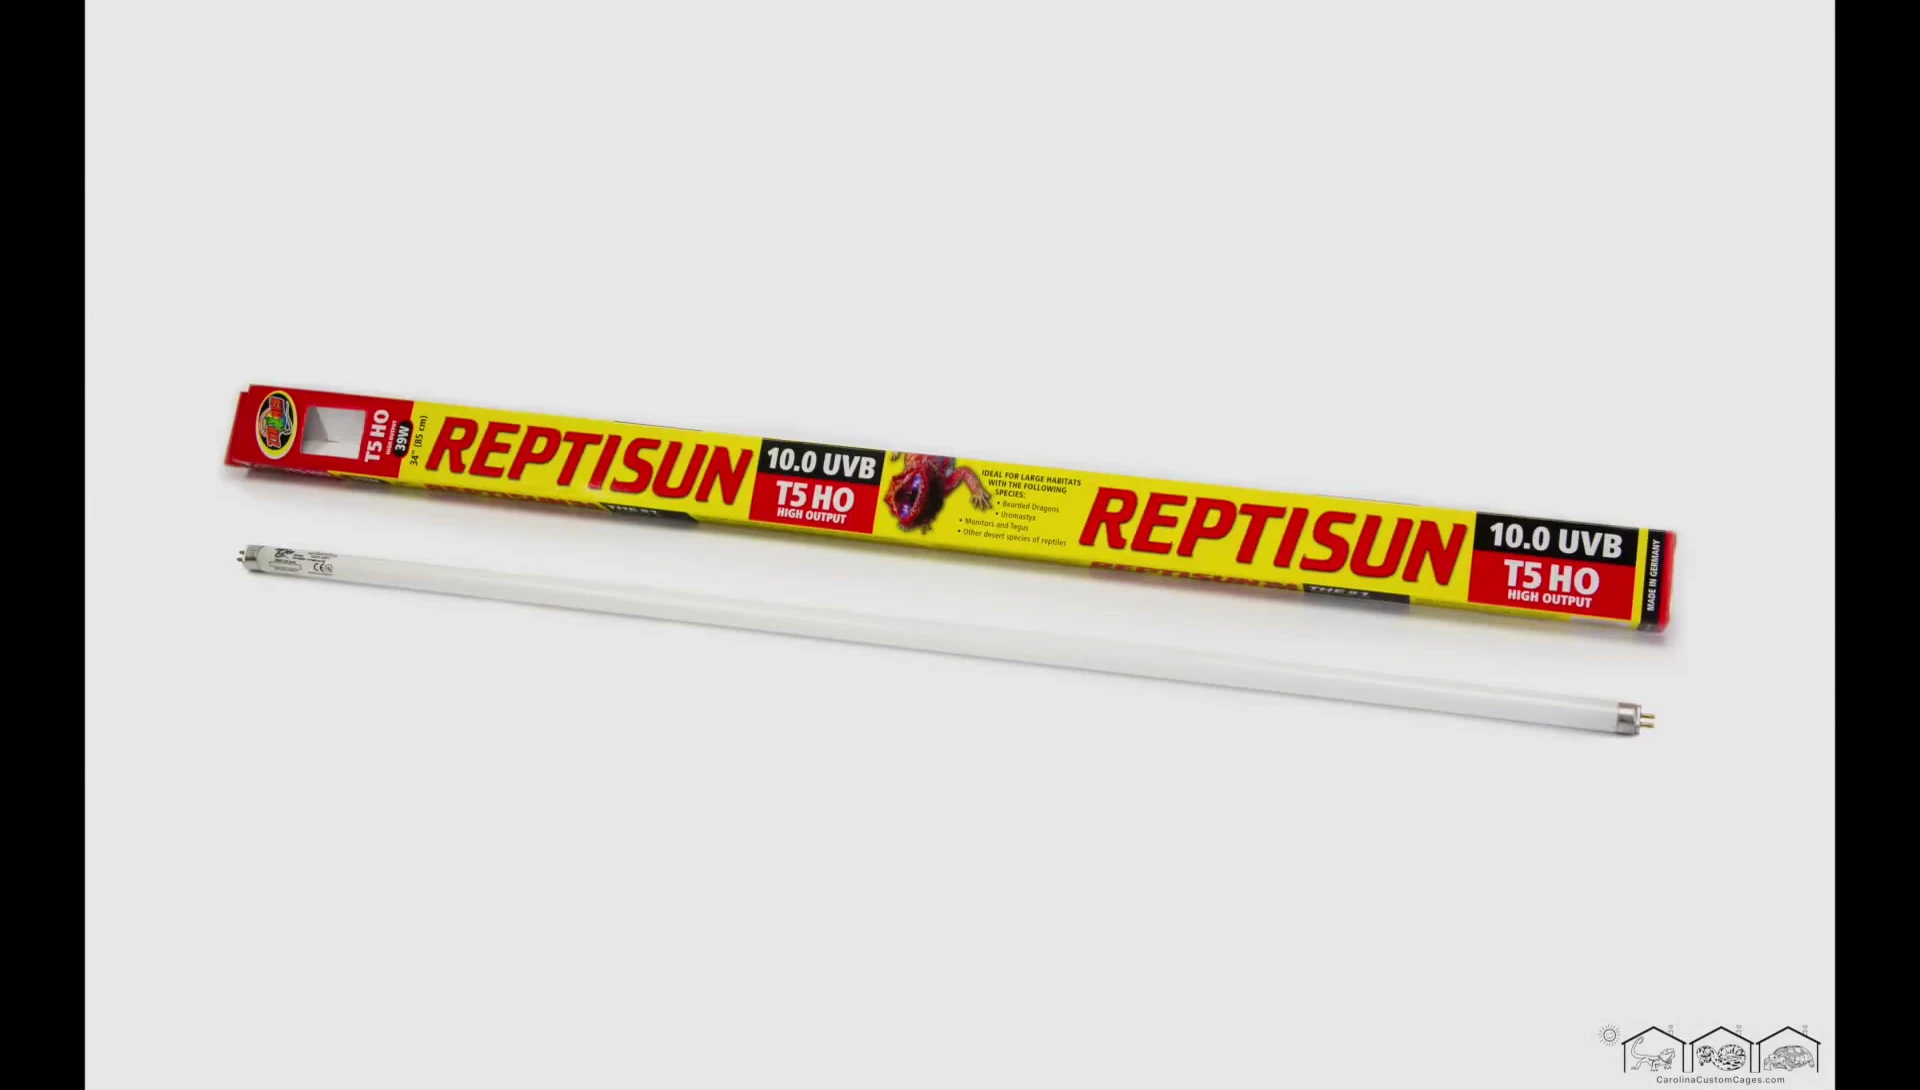
Insert the UVB tube into the fixture connectors, ensuring the pins align correctly. Rotate the tube 90 degrees to secure it in place. This step completes the installation of the lighting unit.
Power Cord Connection and Final Steps
Attach the power cord to the fixture, routing it through a cable slot. Keep the thumb wheel switch accessible from outside the terrarium.
Plug the power cord into a timer (recommended) and use the switch to turn on the fixture. This completes the entire installation process.
Remember to keep heat-producing fixtures away from the UVB fixture to prevent damage.
Conclusion
The Carolina Custom Cages 34-inch T5HO UVB Standard Light Fixture is a well-designed and easy-to-install product. The comprehensive hardware package and clear instructions make installation straightforward, even for beginners.
The inclusion of a mylar reflector ensures optimal UVB distribution, and the variety of hardware caters to most terrarium setups. The recommended Zoo Med Reptisun UVB tube is a high-quality choice.
Overall, this light fixture provides excellent value for money and is a highly recommended purchase for reptile keepers seeking a reliable and efficient UVB lighting solution.