This detailed guide walks you through the construction of a stunning Exo Terra 30cm Cube mini paludarium. Learn how to build a captivating miniature ecosystem, complete with a functioning waterfall, lush vegetation, and a carefully crafted background. We’ll cover every step of the process, from essential pre-build checks to the final planting and detailing. This project offers a rewarding experience for hobbyists of all skill levels, resulting in a beautiful and relatively low-maintenance addition to any home.We'll explore techniques for creating a robust and aesthetically pleasing structure using readily available materials like egg crate, expanding foam, and insect mesh. Discover how to seamlessly integrate a water pump, ensuring easy access for maintenance. Learn the best methods for shaping the foam background, selecting appropriate plants, and creating a visually compelling substrate layer. This guide provides practical advice and problem-solving strategies to ensure a successful and enjoyable build.
Pros And Cons
- Aesthetically pleasing
- Water pump easily accessible for replacement
Read more: Top 5 Turtle Terrariums: Reptile Habitats Reviewed
Testing the Water Pump
Before starting any paludarium construction, it's crucial to test the water pump. This ensures functionality and avoids potential setbacks. A malfunctioning pump could require dismantling the entire build, resulting in wasted time and effort. Thankfully, in my case, the pump worked flawlessly.
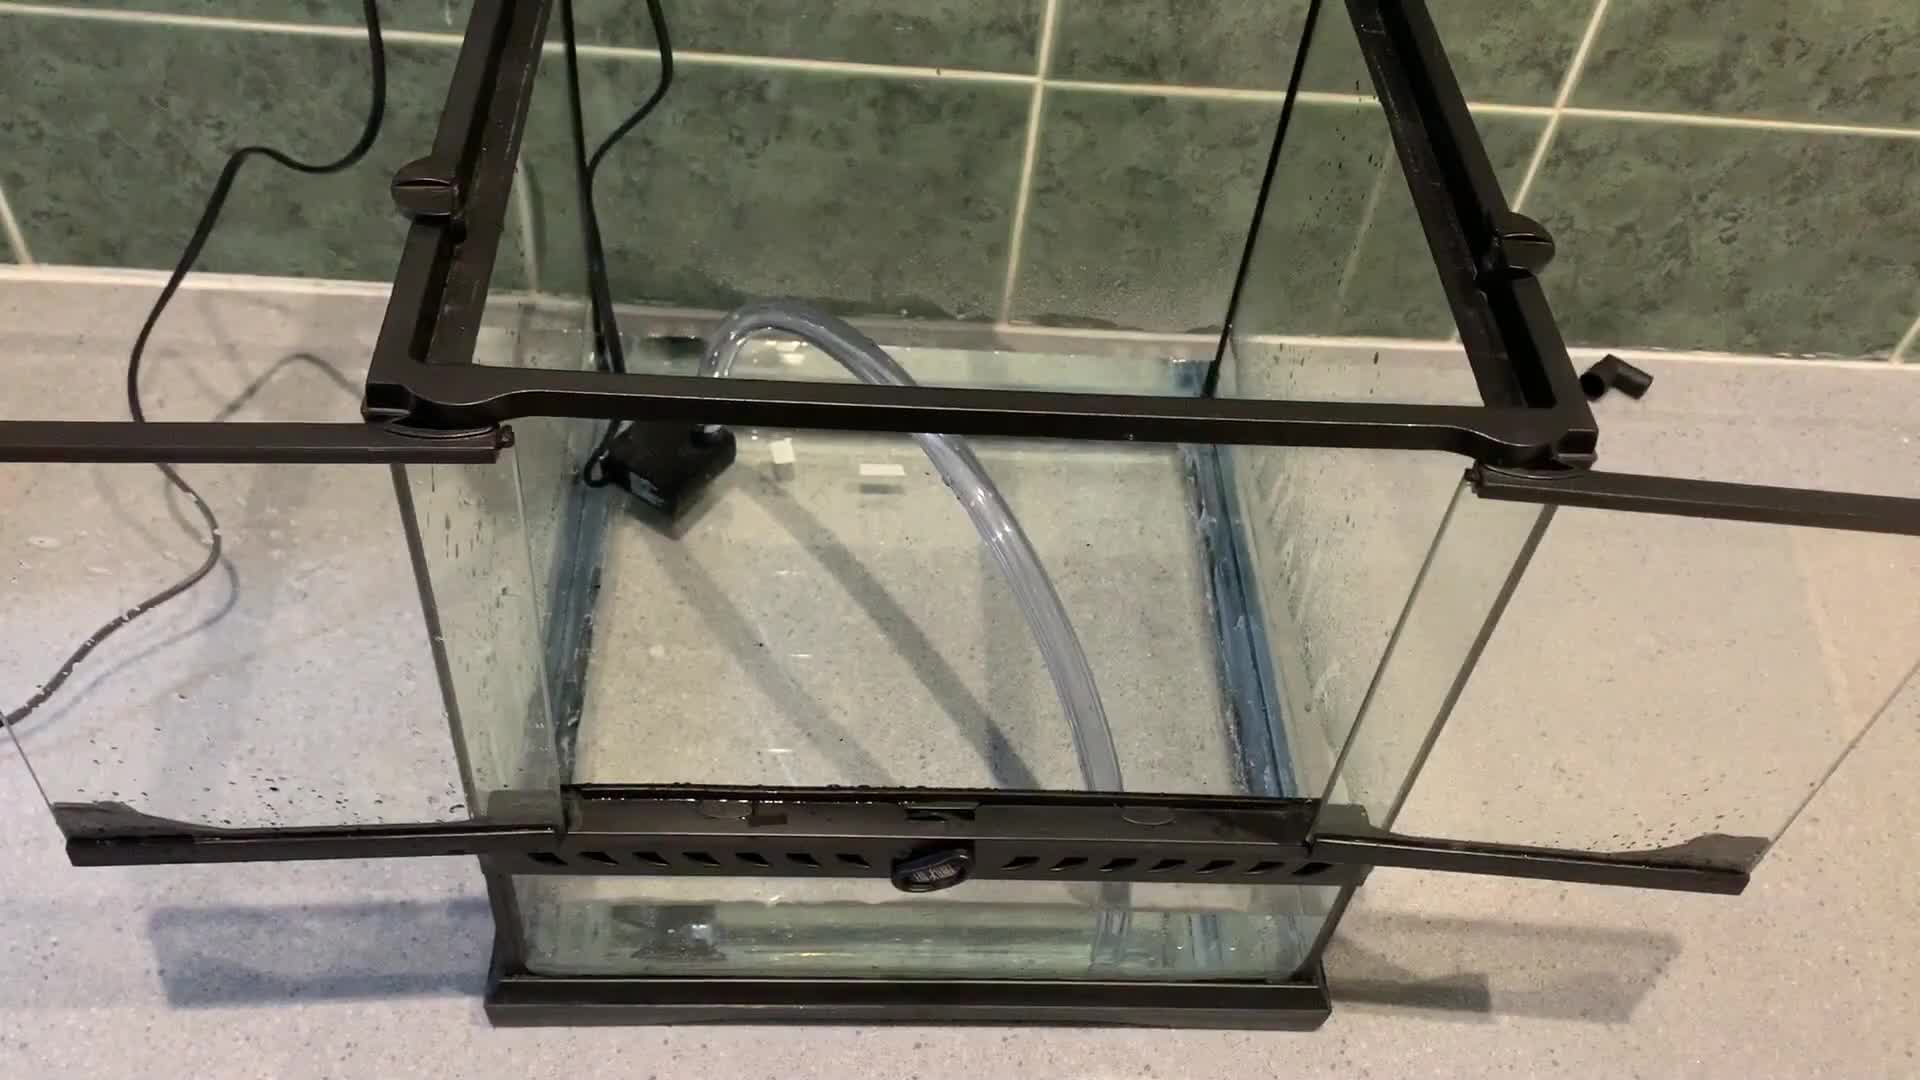
This initial check saved me considerable time and frustration later in the process. It underscores the importance of testing components before proceeding with the build itself. A simple test ensures smooth progress from the outset. It highlights a critical initial step often overlooked in DIY projects.
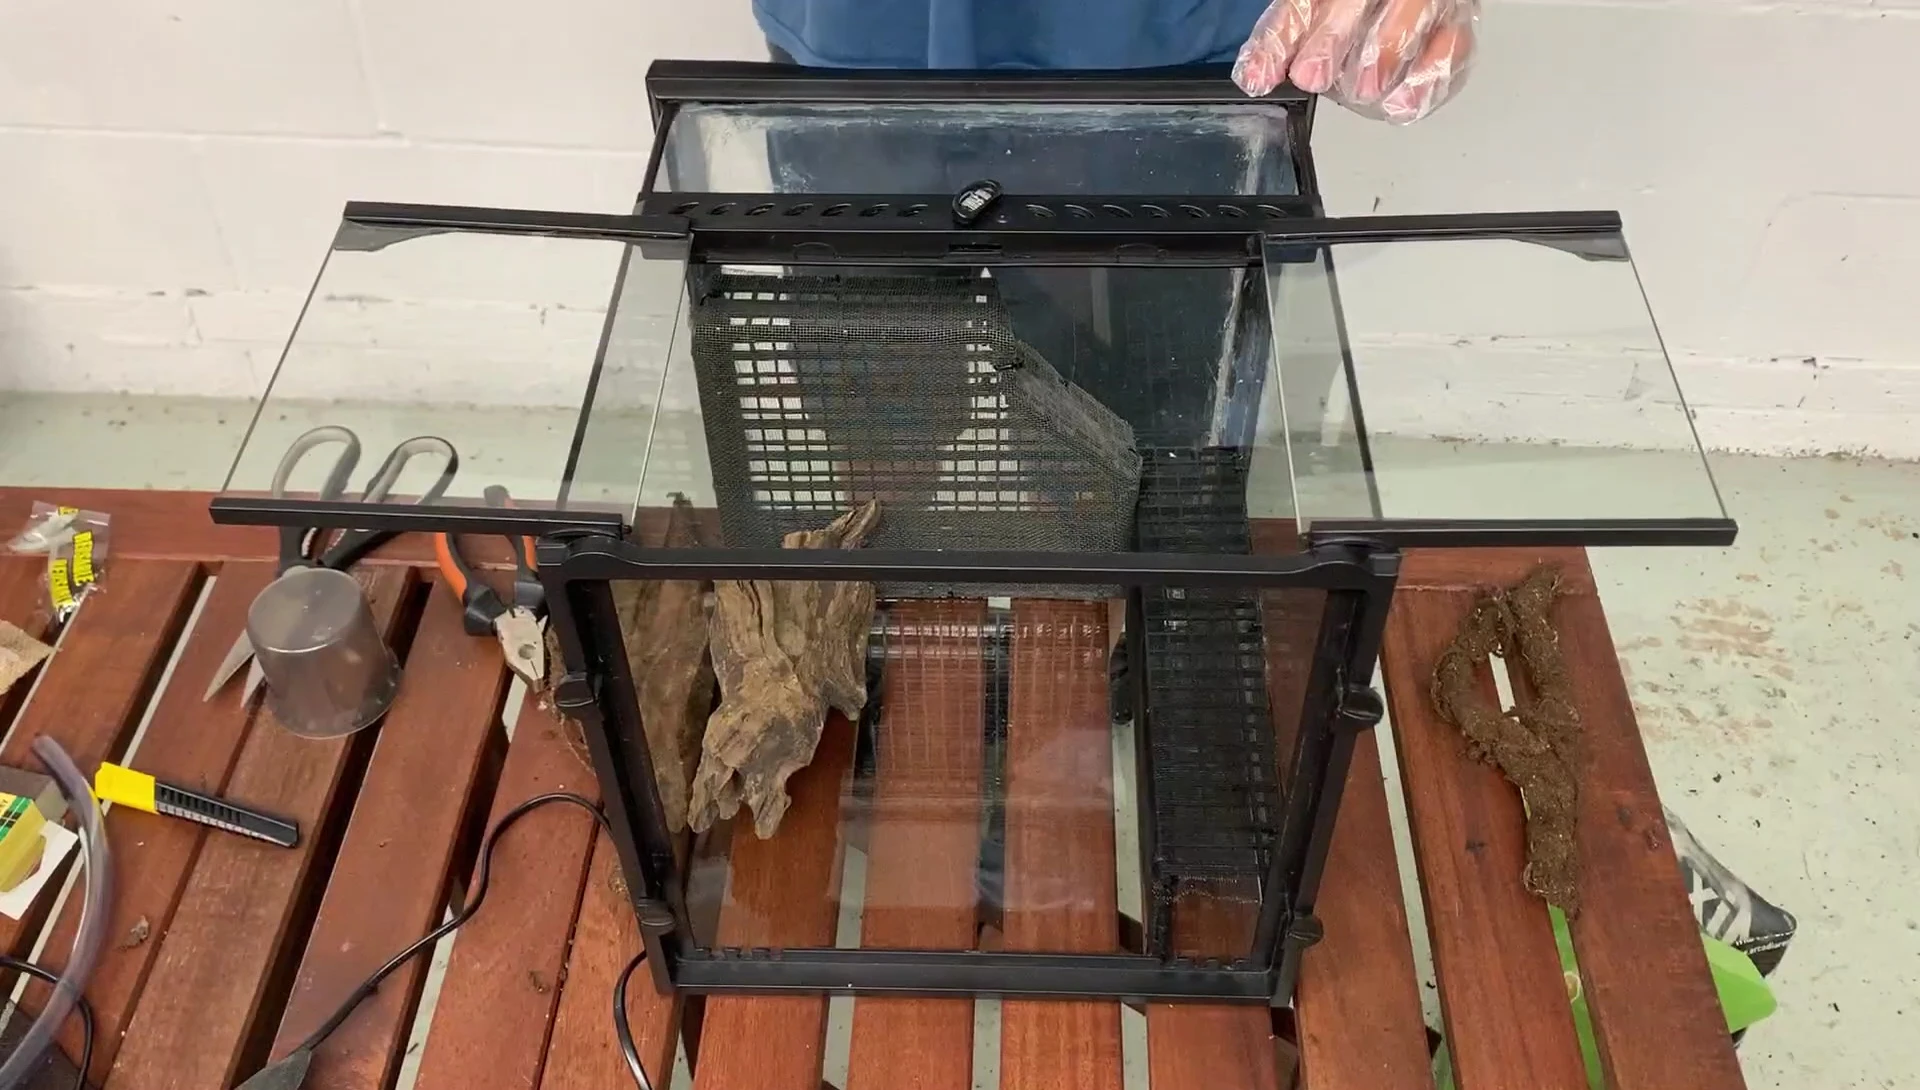
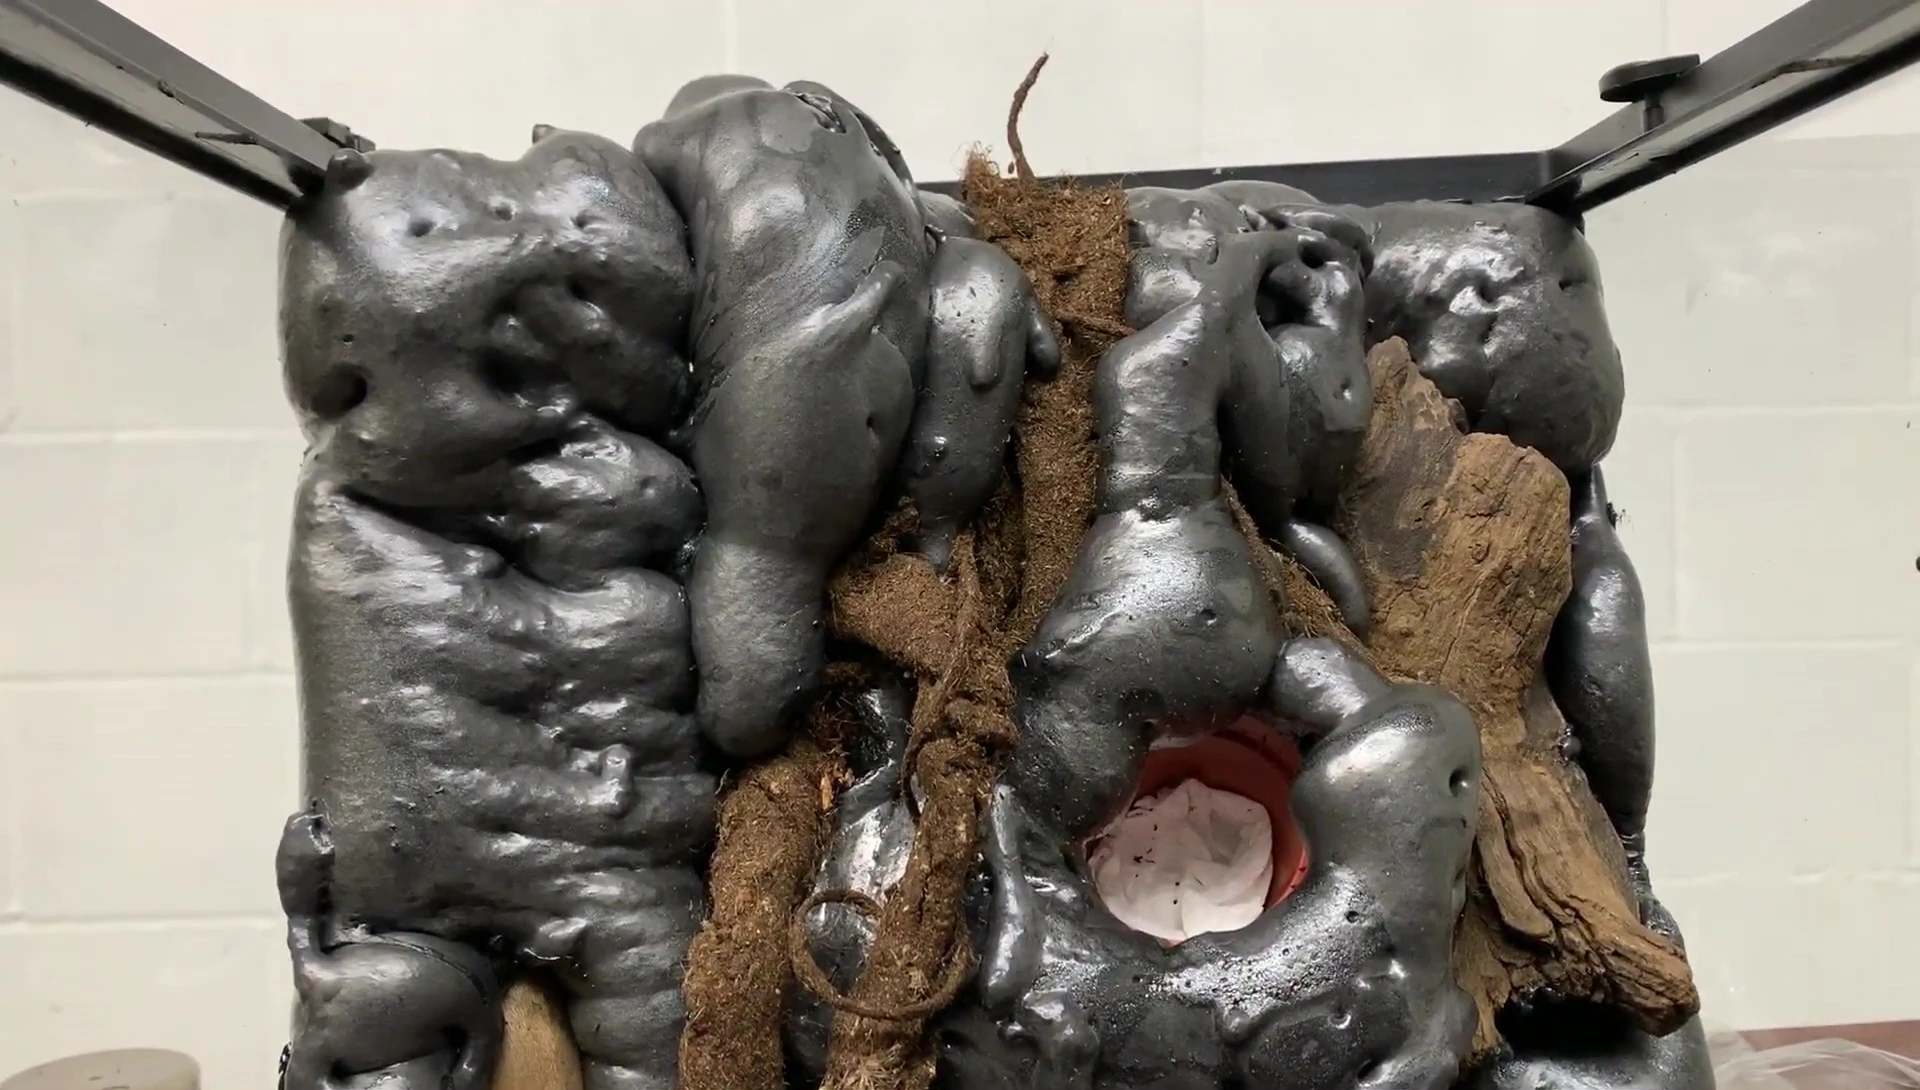
Creating the Waterfall Structure
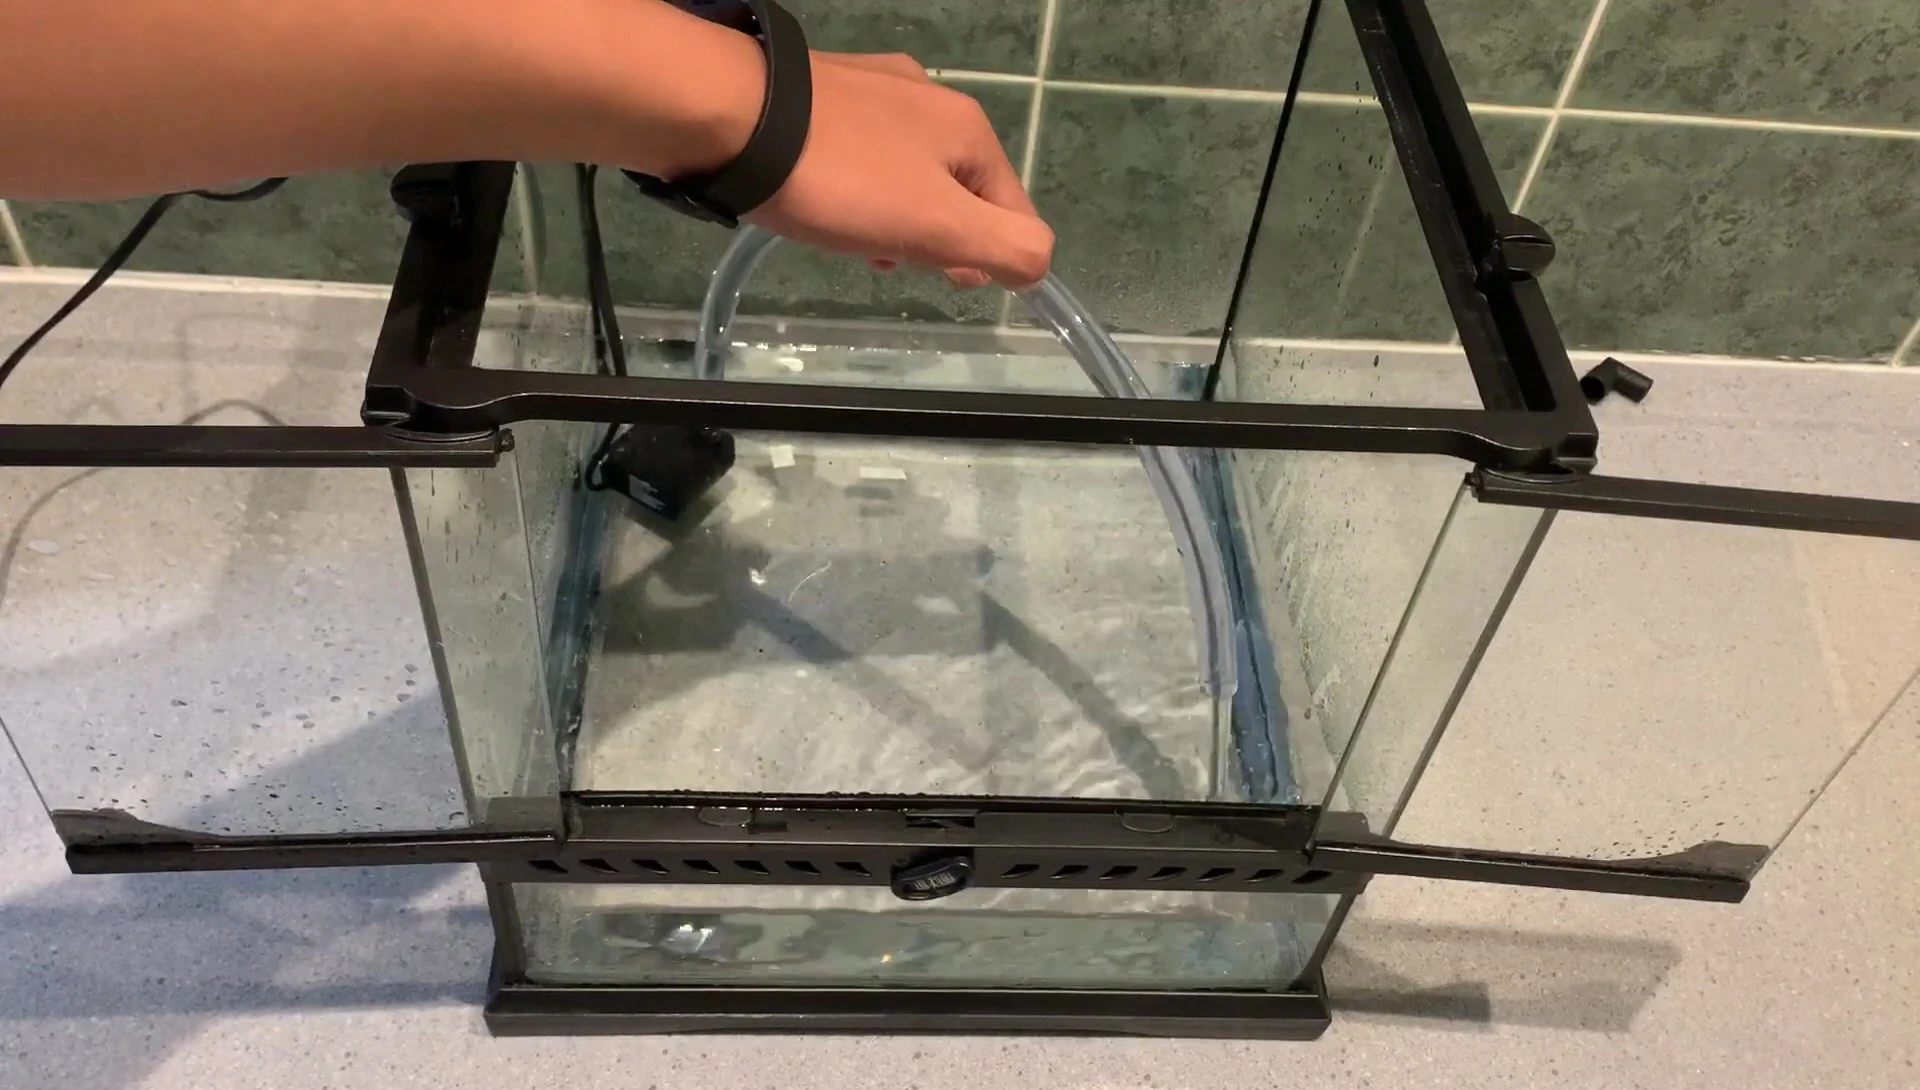
The waterfall section was constructed using egg crate, cut and shaped to create an enclosed area for the pump. This design not only hides the pump but also enhances the aesthetic appeal. Insect mesh covered the egg crate for added strength and a more natural look.

The waterfall design also incorporates easy access for pump replacement. All water pumps eventually fail, and this design enables effortless maintenance and repairs without compromising the overall structure. This practical feature is crucial for long-term paludarium maintenance.
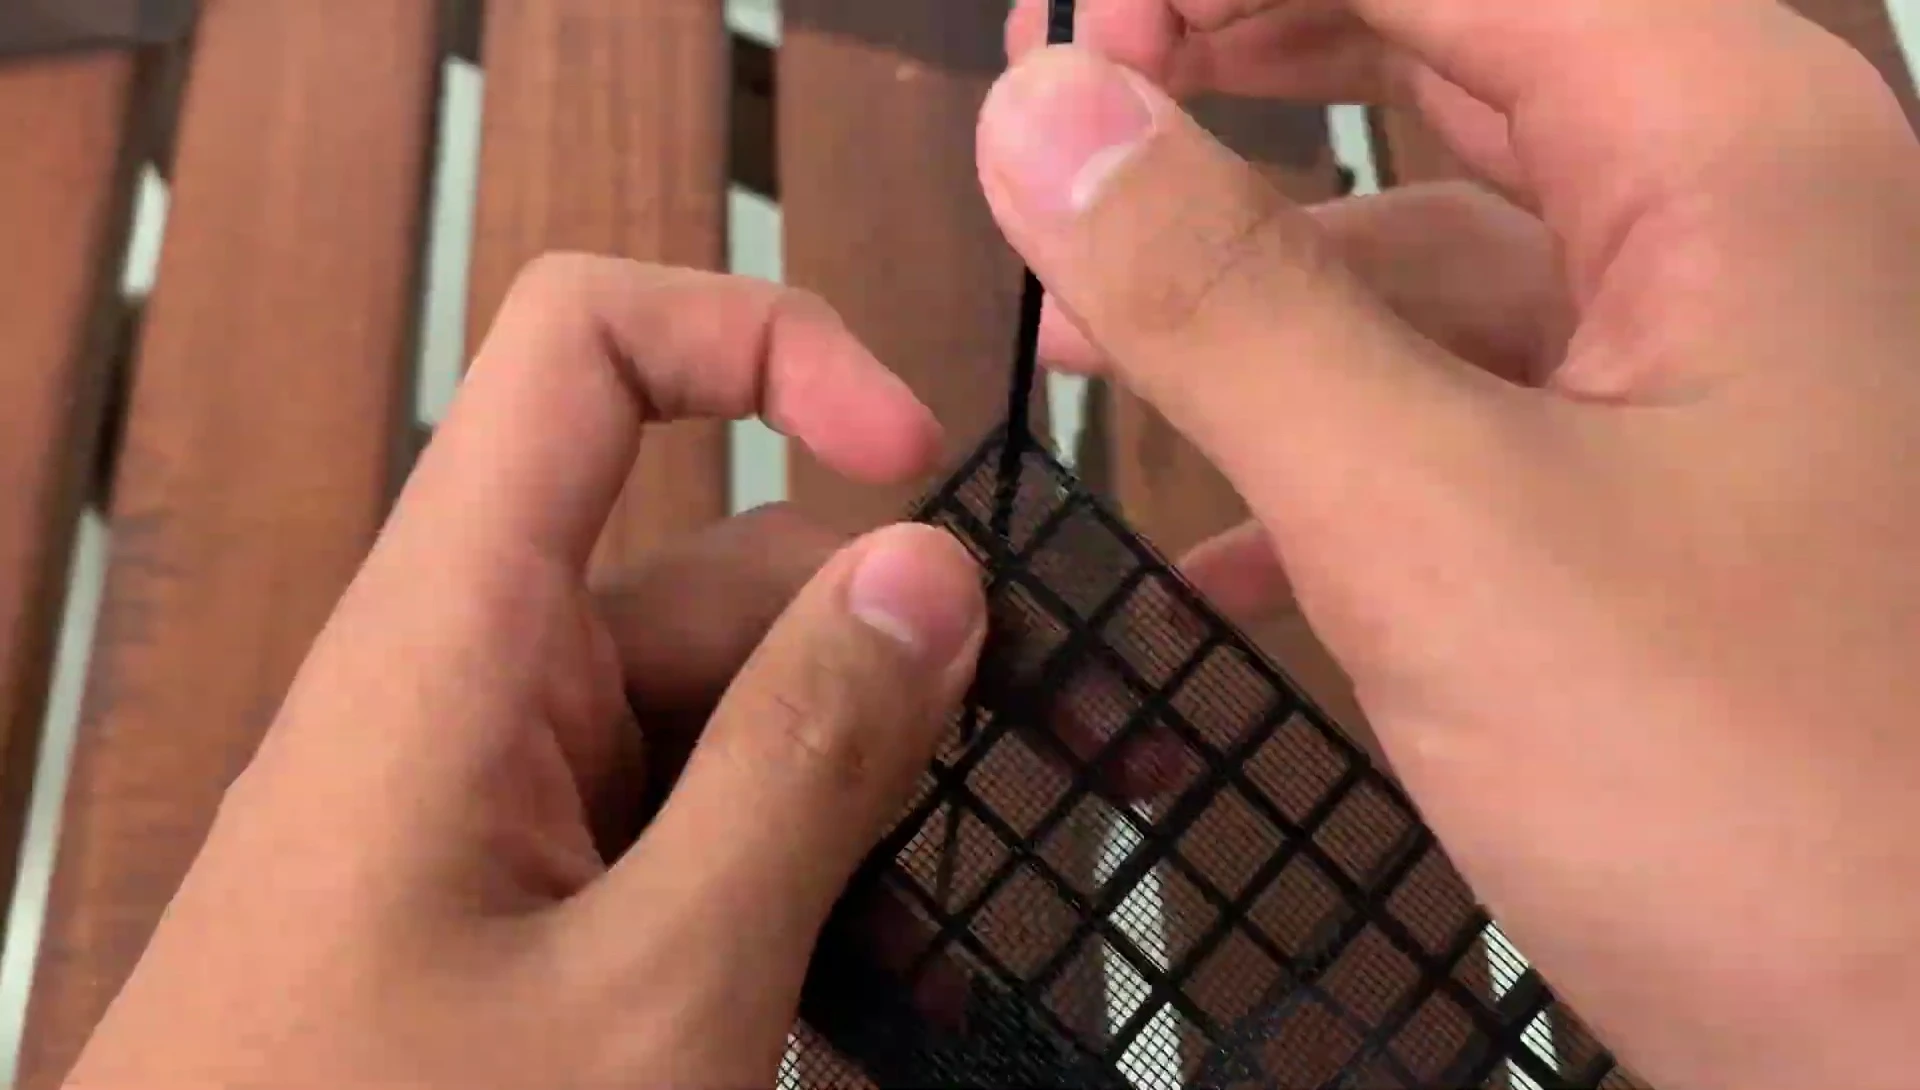
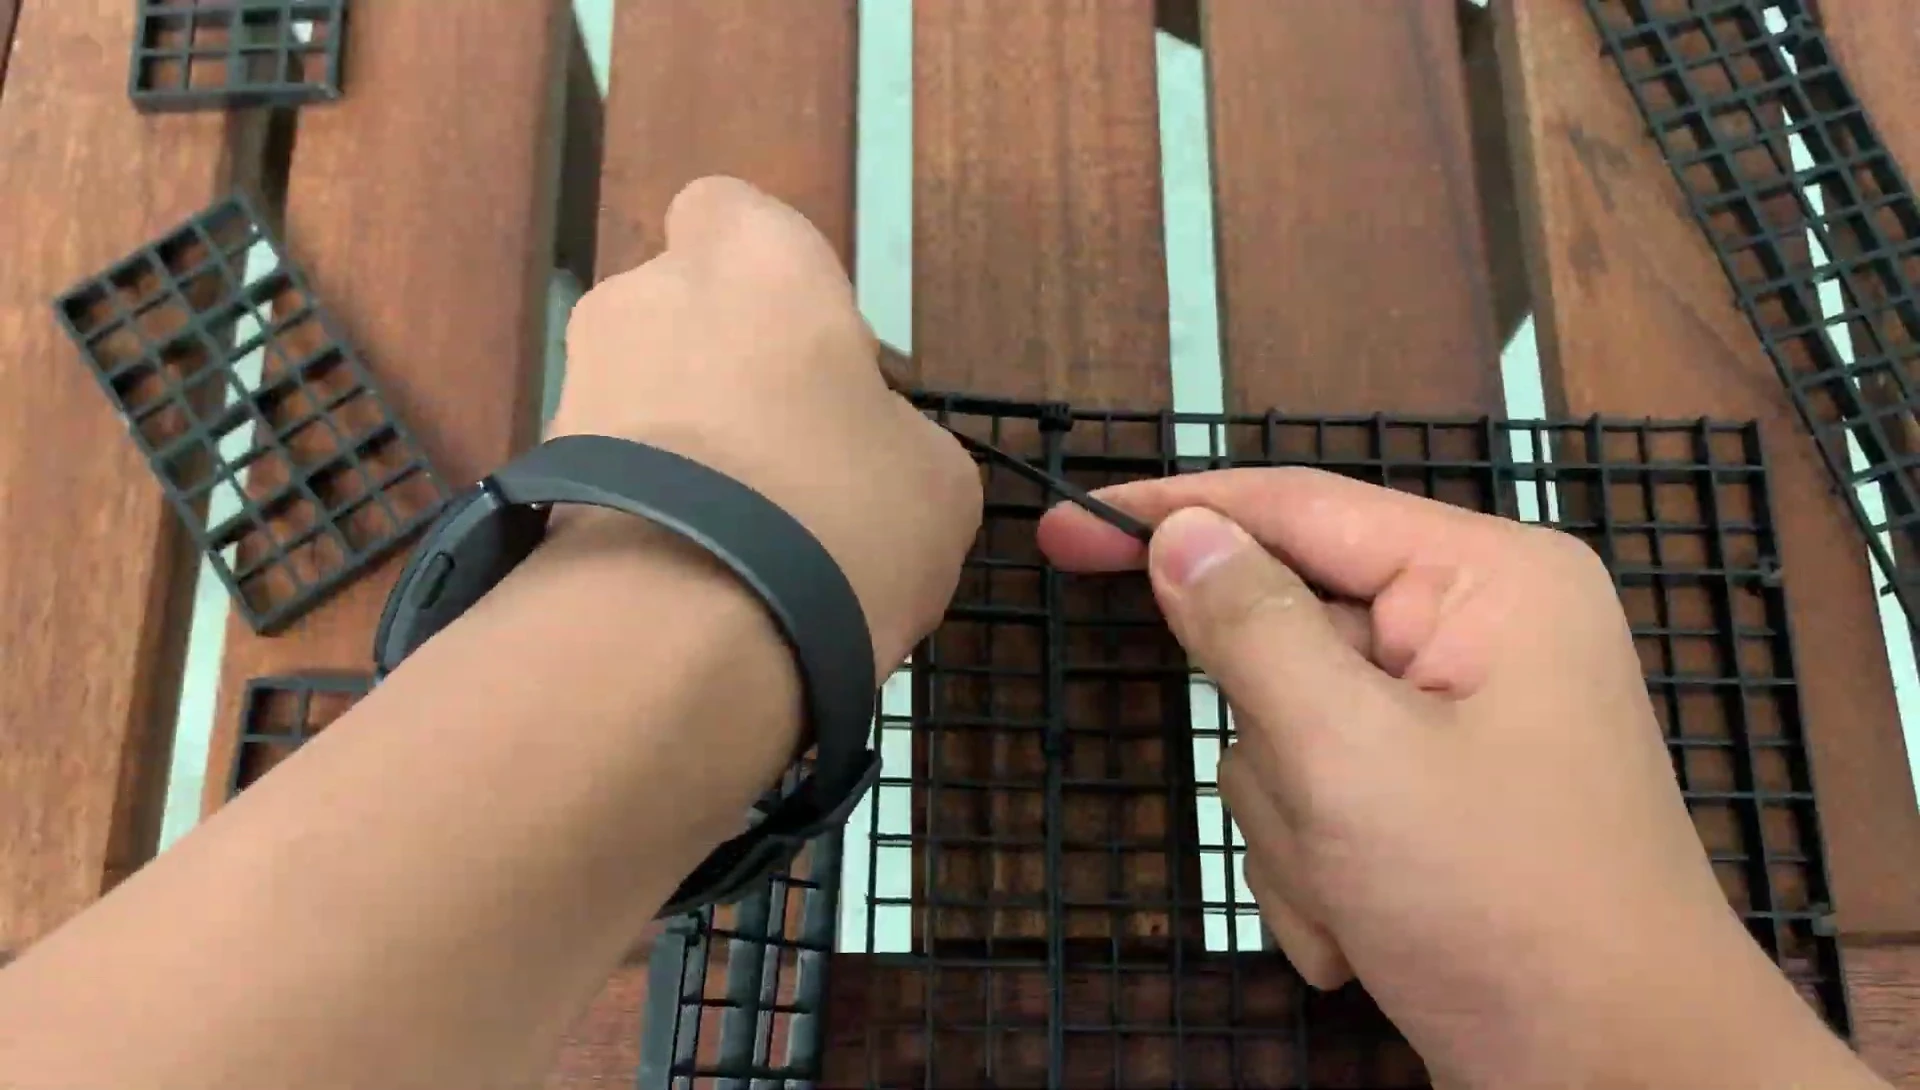
Building the Land Area
The land portion was created similarly, utilizing egg crate cut into various shapes and sizes. These were secured with zip ties and covered with insect mesh, providing a robust base. This method ensures strength and stability for the entire structure.
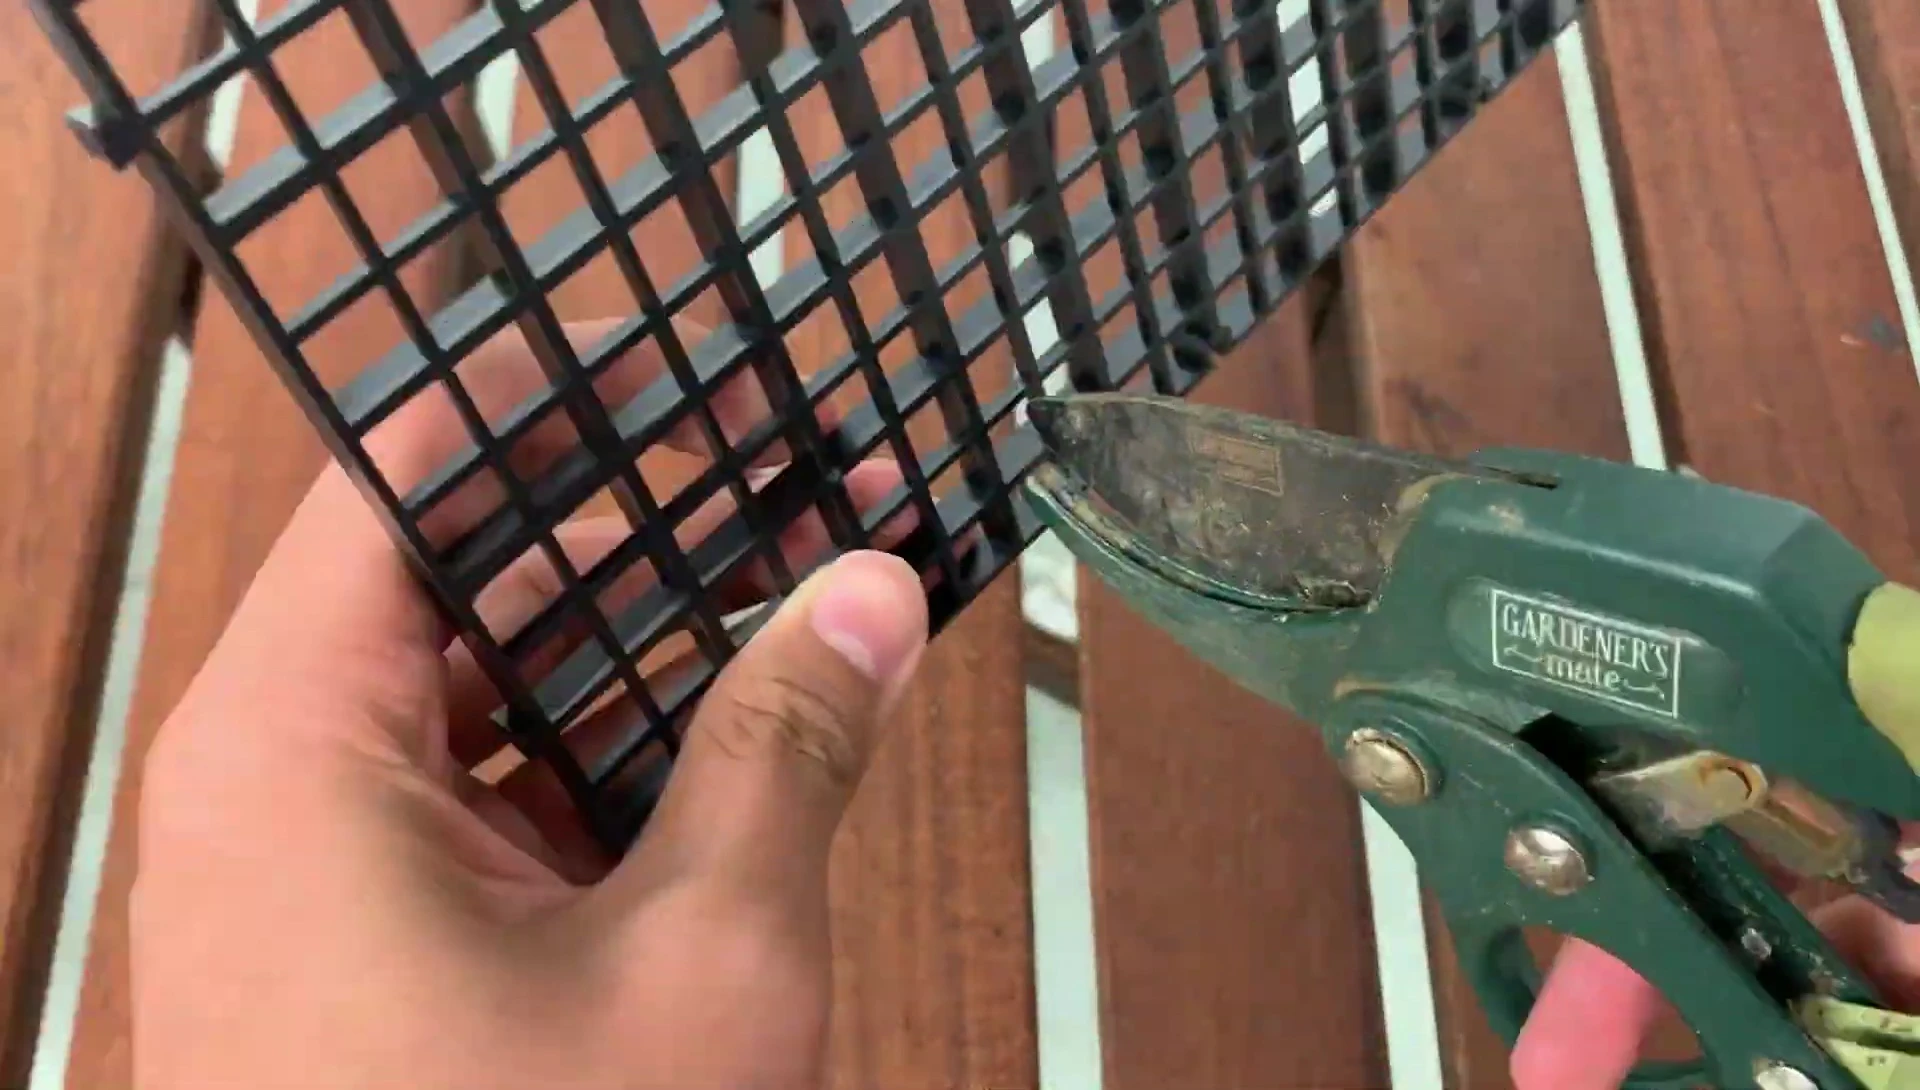
The process was more time-consuming than anticipated, but meticulous construction was vital. The land area needs to support the weight of the substrate, plants, and decorations, preventing collapse. Therefore, a strong and well-constructed foundation was paramount.
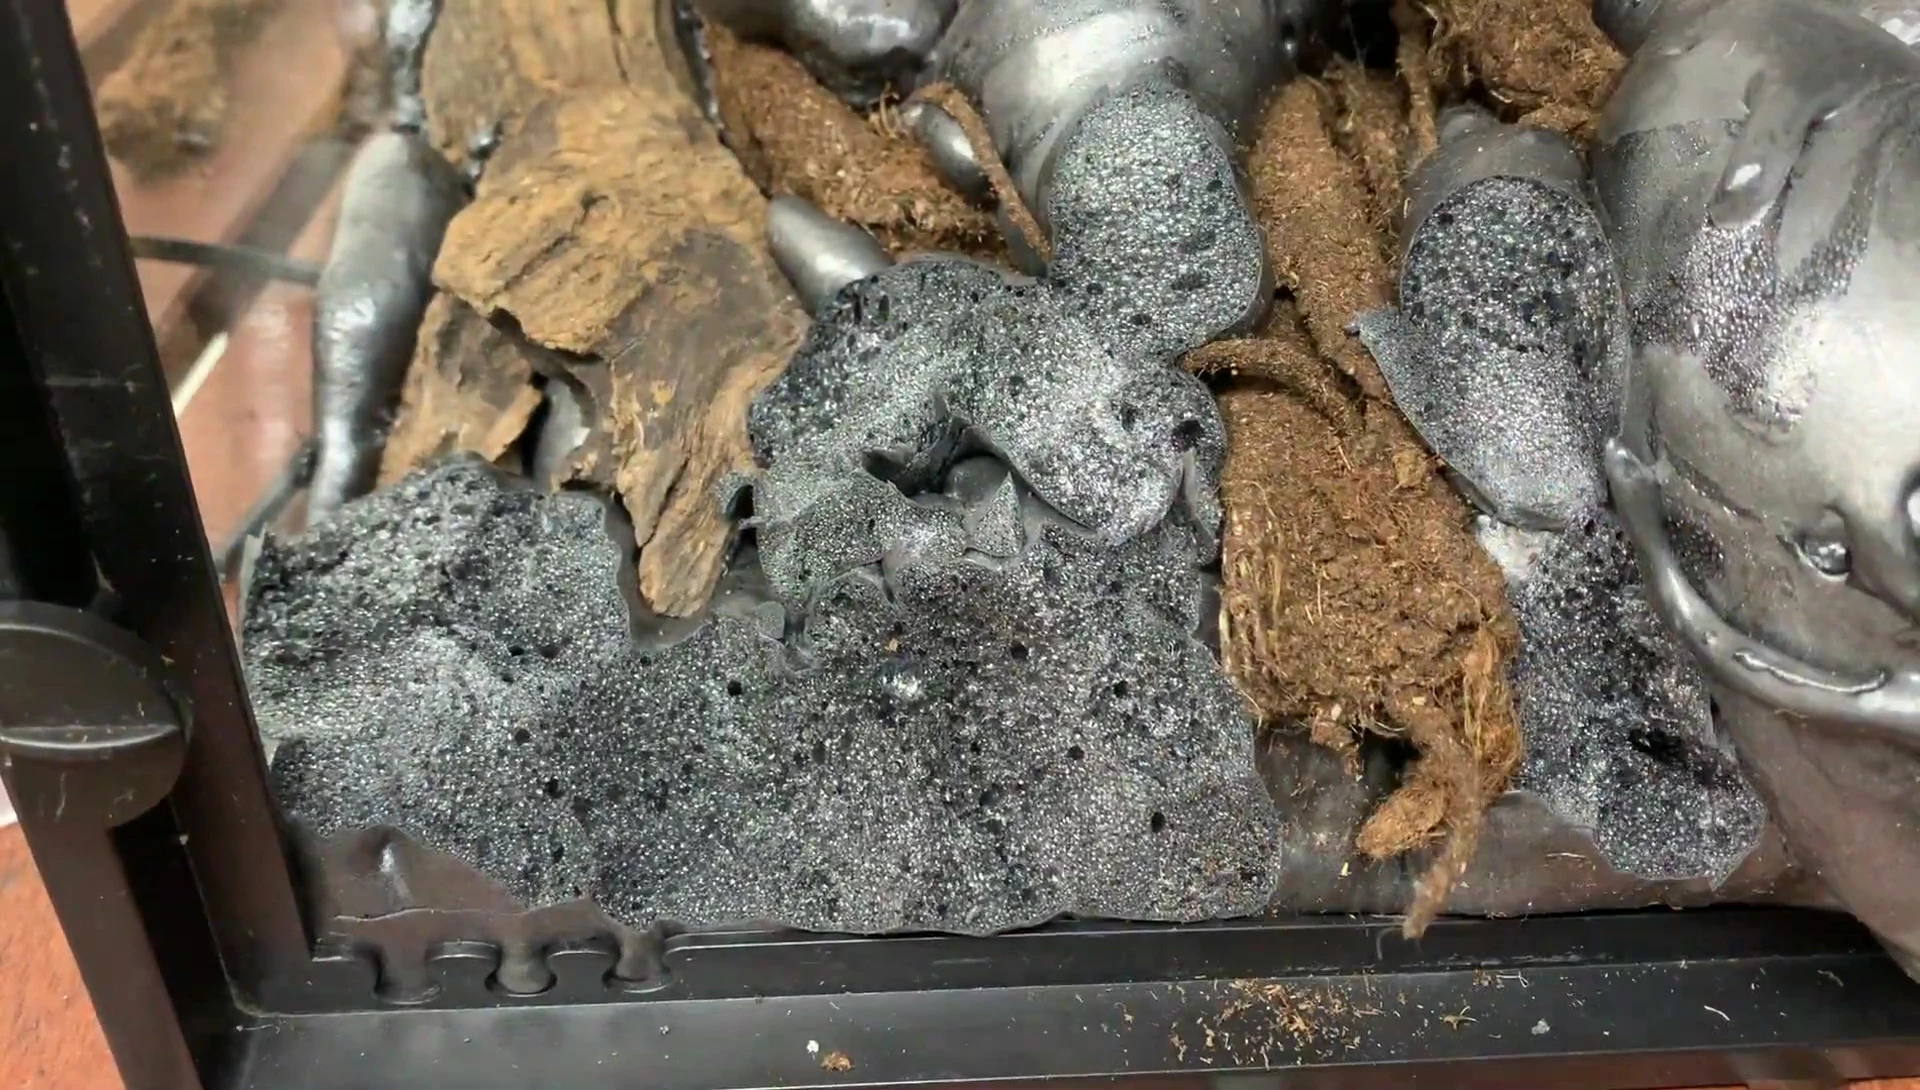
Applying Expanding Foam
Expanding foam was applied to create a natural-looking background. Always wear gloves when handling expanding foam, as it's difficult to remove from skin. It's better to apply too much foam initially as it can be carved back later.
The foam expands significantly, so account for this when adding rocks and wood. A systematic approach, such as a zigzag pattern, ensures complete coverage and eliminates gaps. This strategy maximizes the foam's adhesion and creates a cohesive, flawless finish.
Carving and Shaping the Foam
After the foam dried, it was carved using a snap-off knife and razor blade. The snap-off knife is helpful for precise control of blade length. The outer layer of the foam is tough, but once through, shaping is easier.
Carving the foam prepares the surface for substrate attachment. Silicone adheres poorly to smooth foam, so carving provides a textured surface for better bonding. This step also shapes the background to achieve the desired aesthetic.
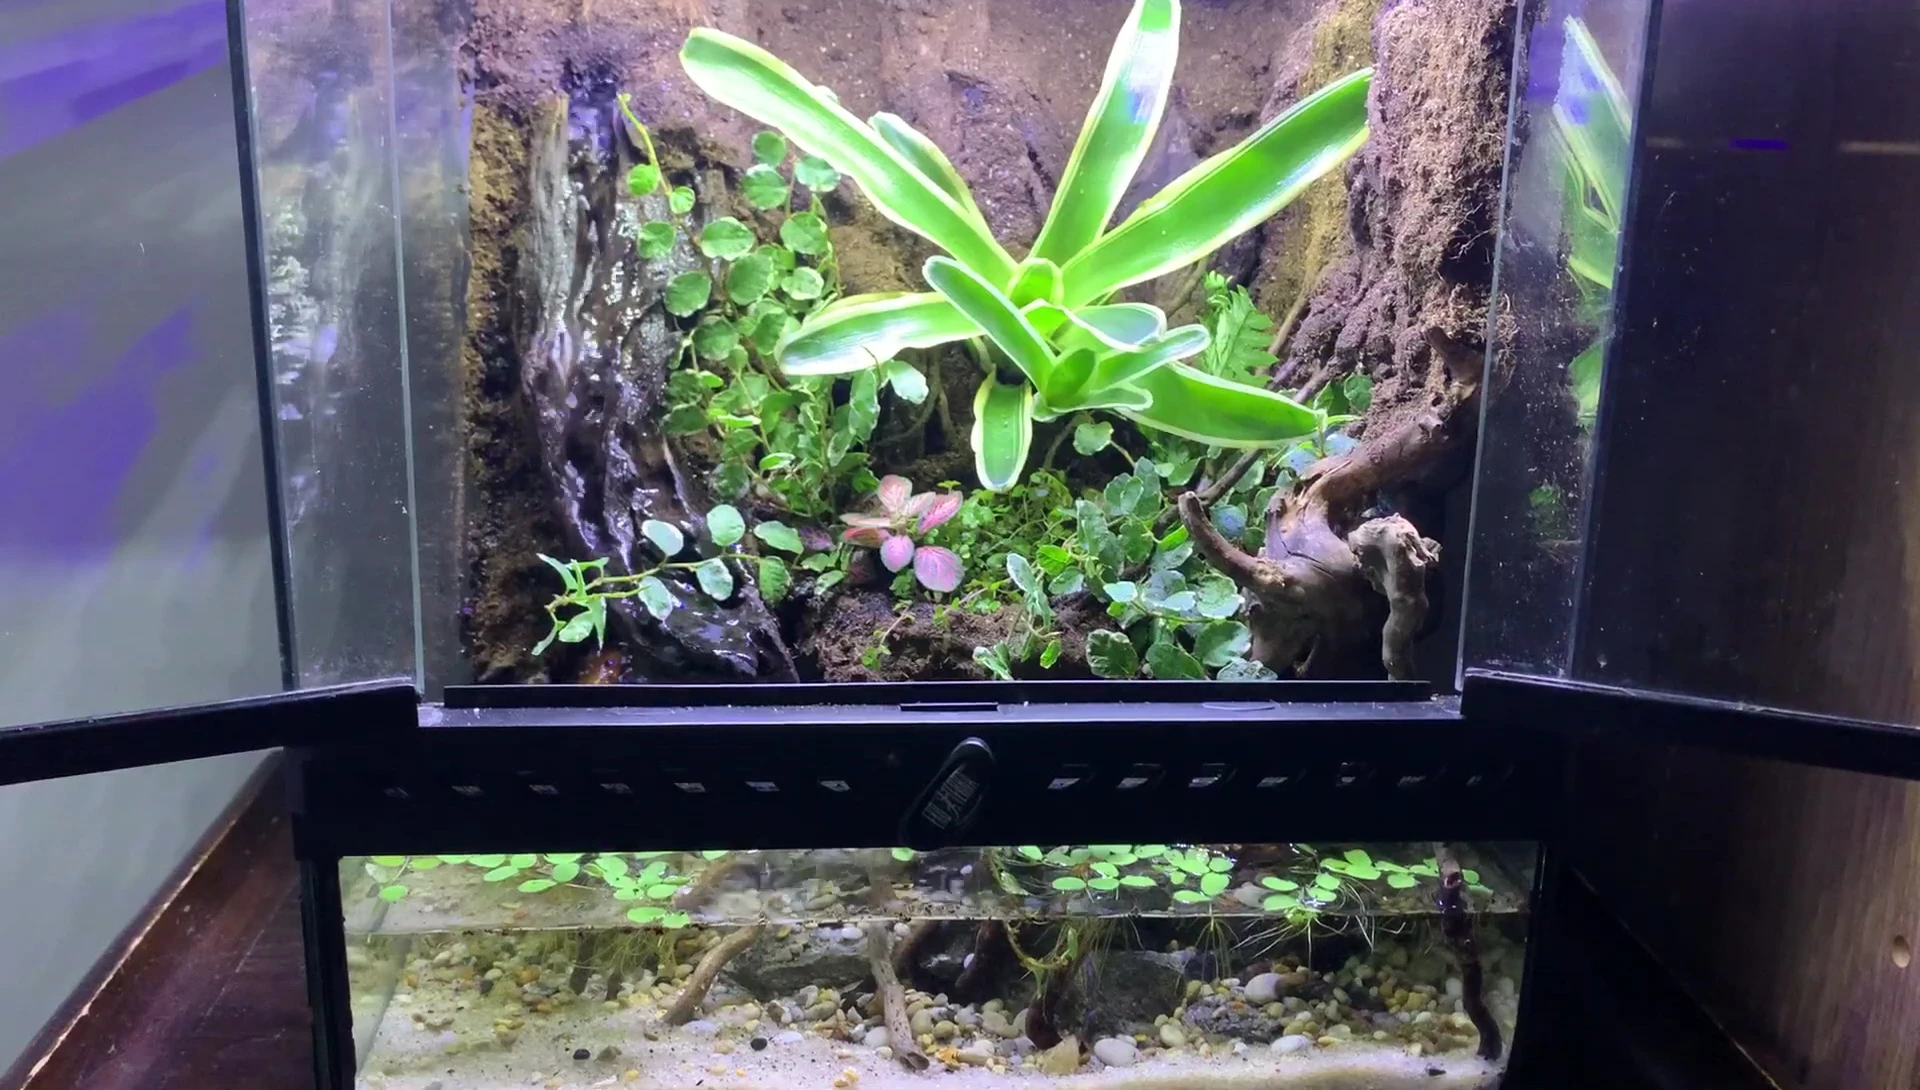
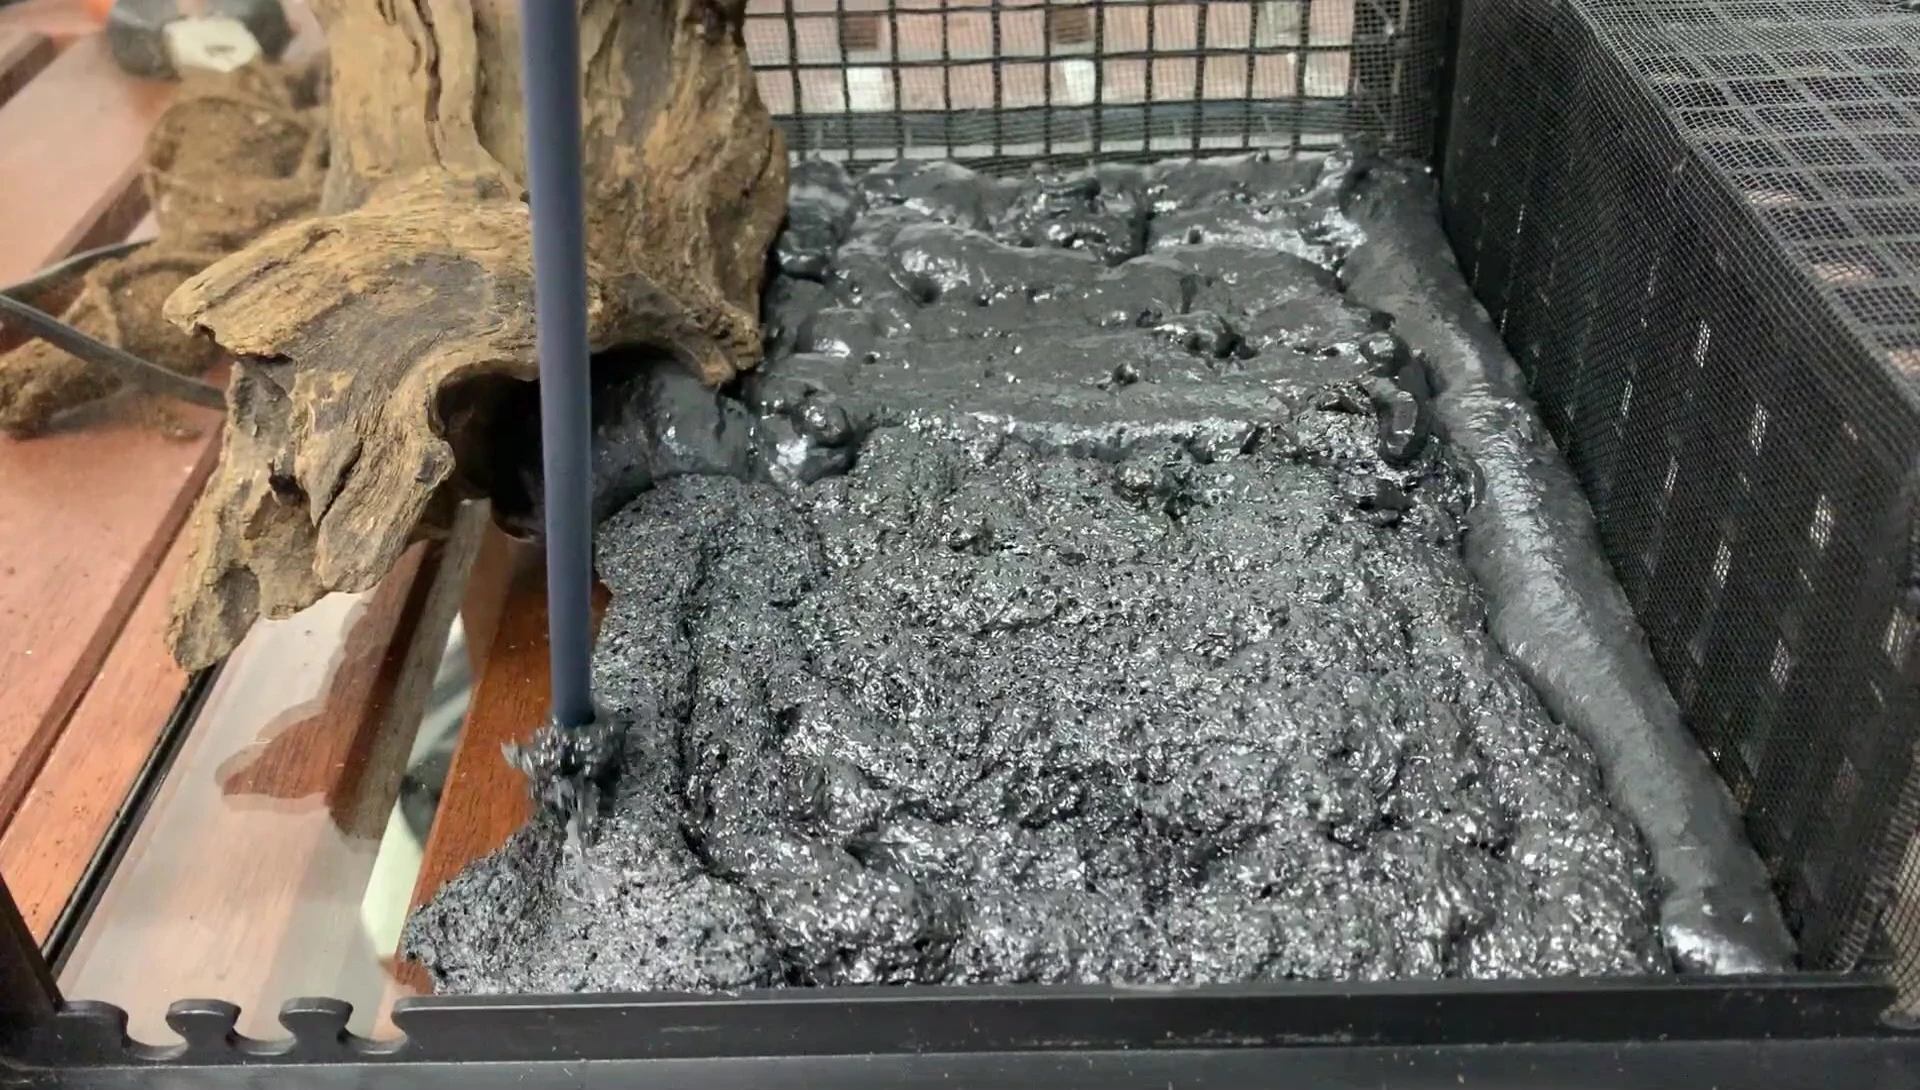
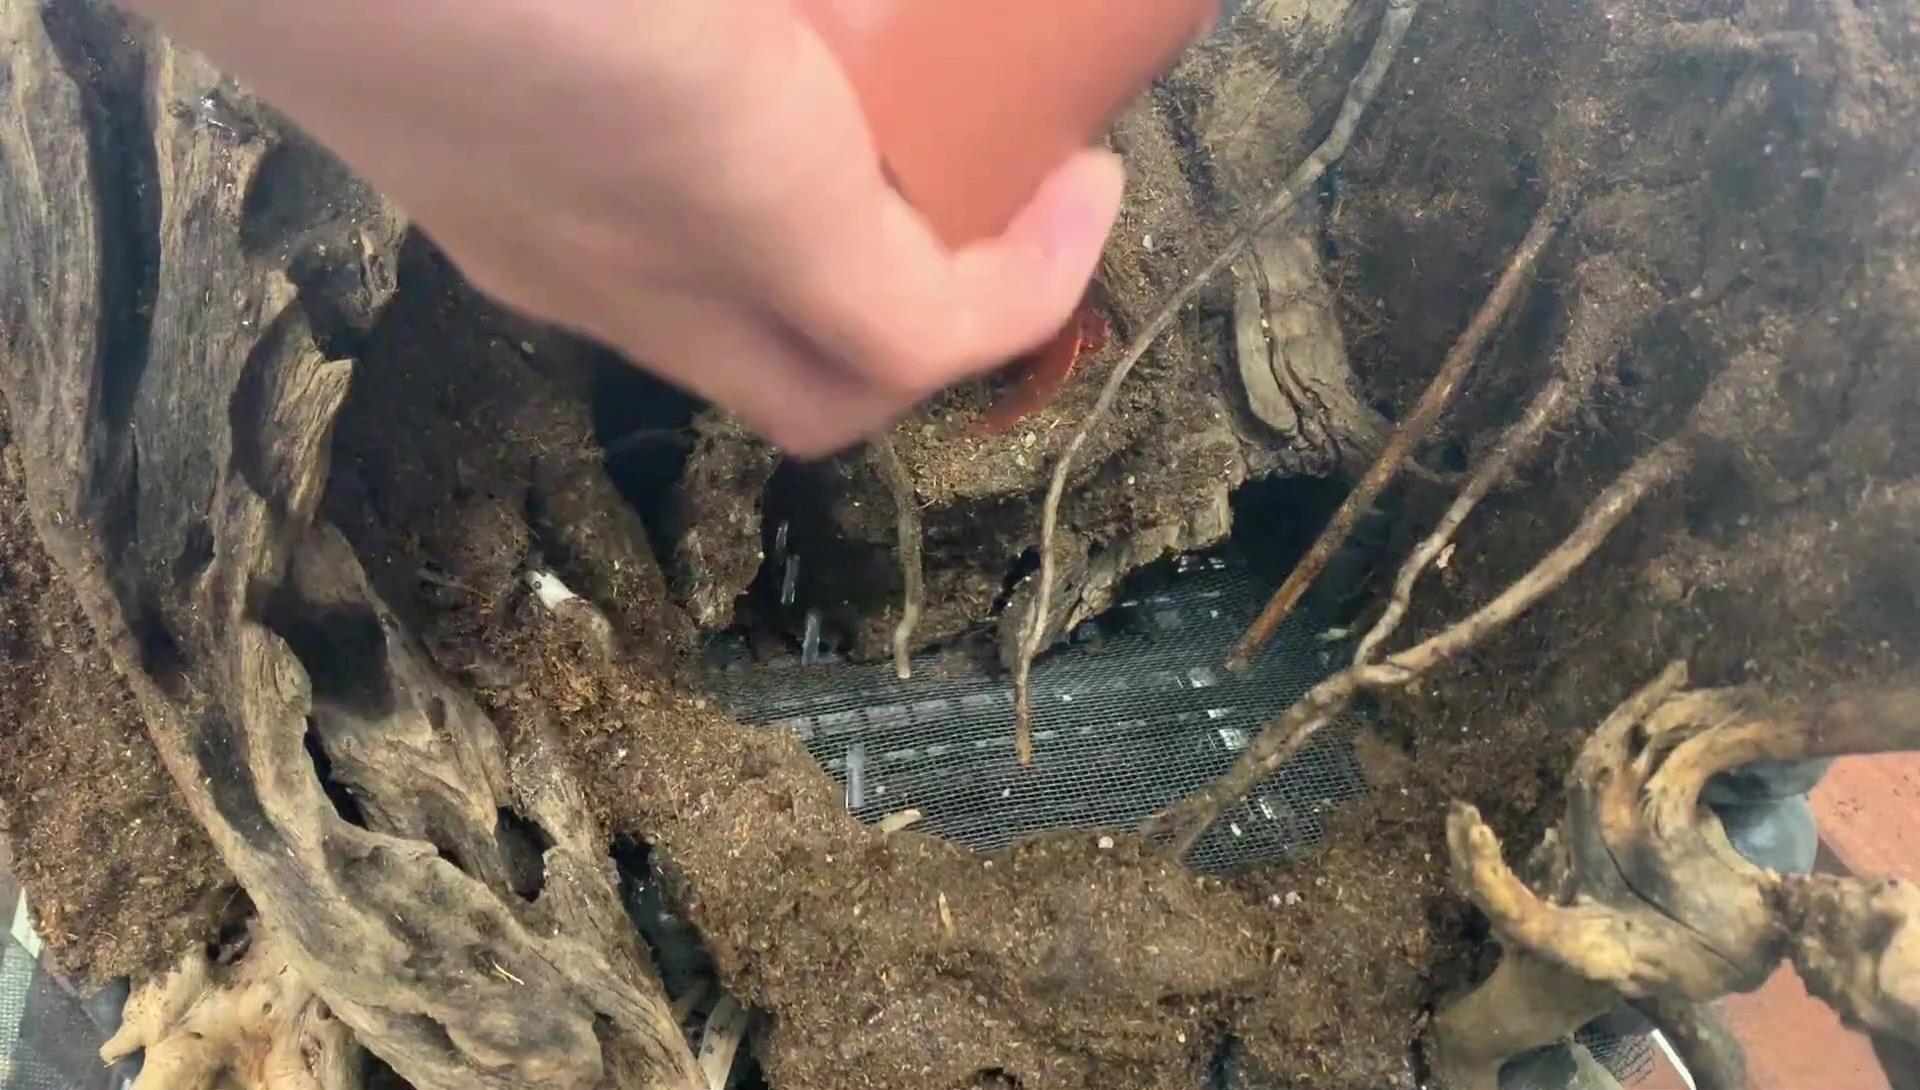
Adding Substrate and Plants
A layer of hydro balls was added to prevent substrate from falling into the water area, followed by insect mesh for separation. Arcadia earth mix and biorevitalizer were used as substrate. Plants were carefully placed.
The bromeliad was secured in a plastic pot, creeping fig added for wall coverage, polka dot plants for color, and baby tears for ground cover. A fern was added but may struggle due to limited space. White sand and gravel completed the look.

Final Touches and Conclusion
Water was carefully poured, avoiding disturbing the substrate. Salvinia was added to the water for aesthetic appeal. The finished paludarium is a visually appealing miniature ecosystem.
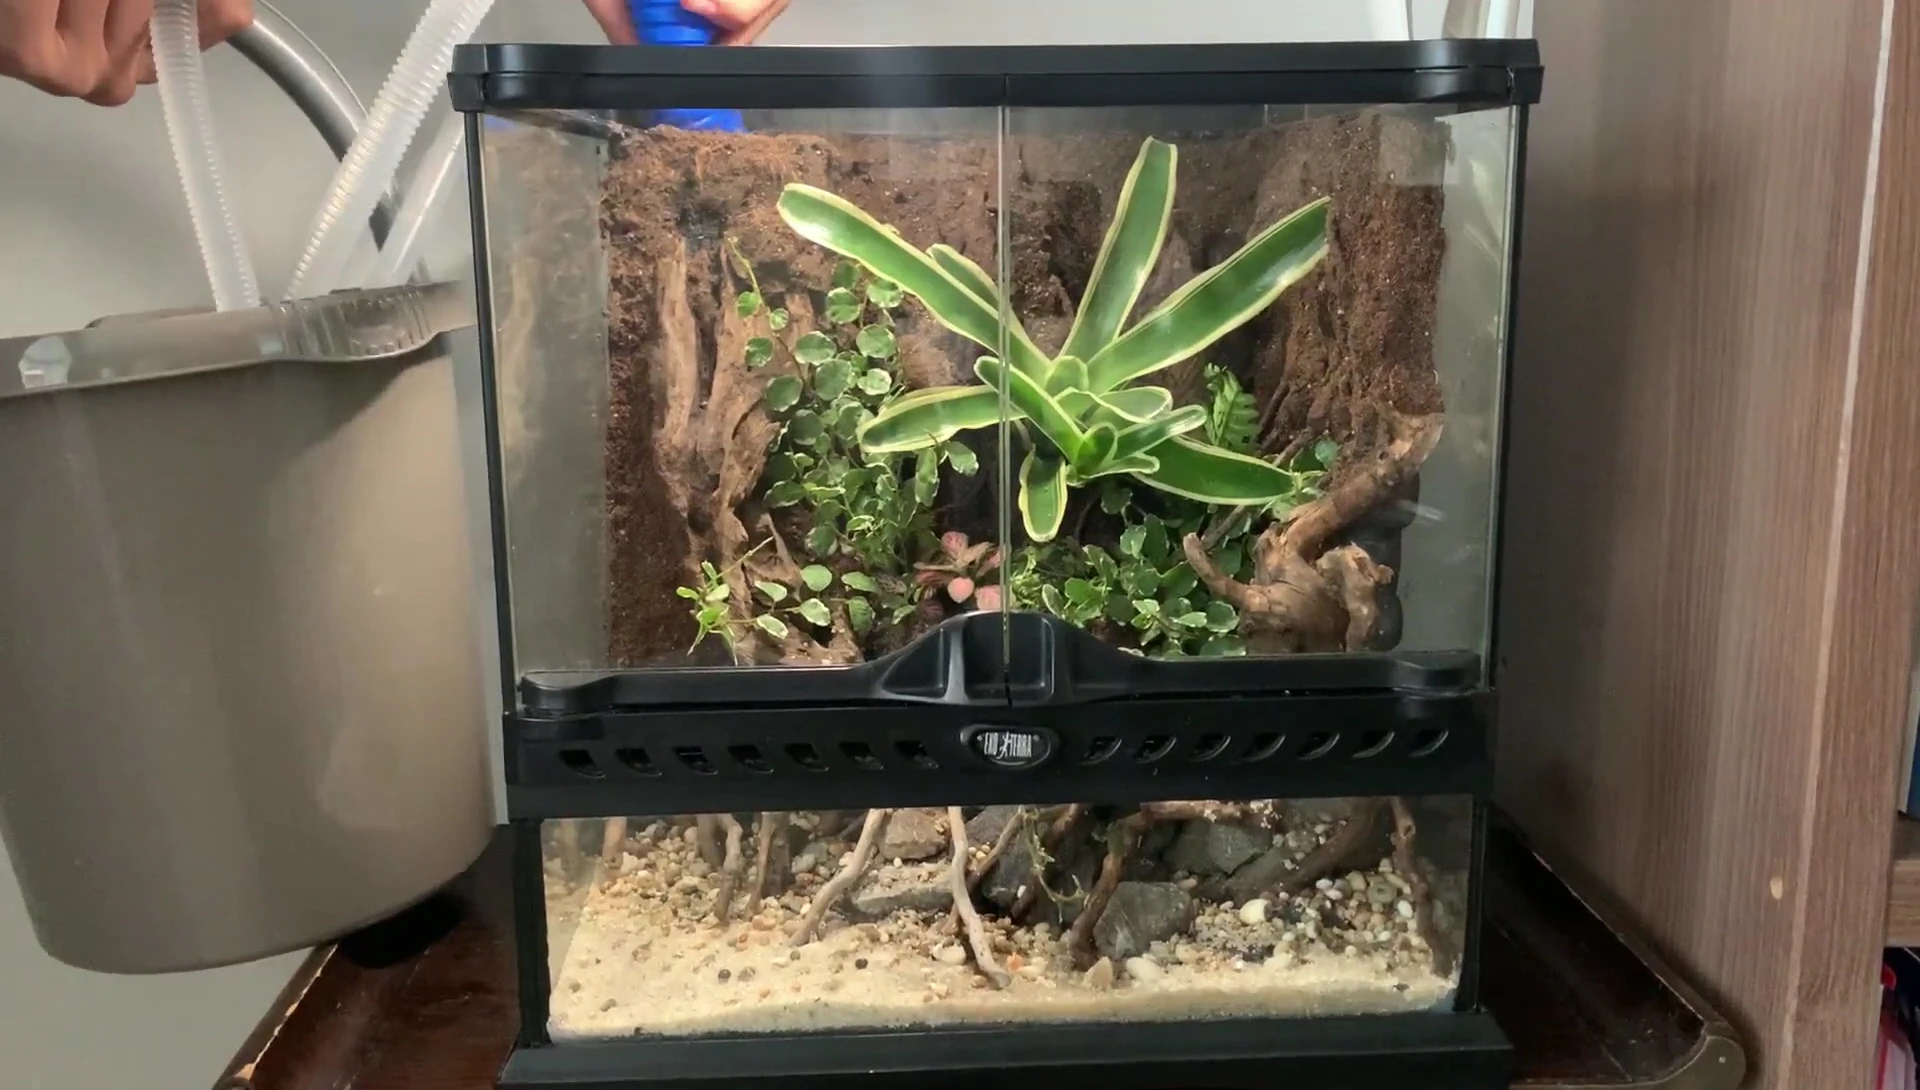
The build involved careful planning, construction, and planting. The Exo Terra 30cm cube provides an ideal size for a mini paludarium. The result is a visually stunning and relatively low-maintenance setup, perfect for adding a touch of nature to any space.